
A4 Cabriolet Mk2
|
|
|
|
|
|
|
 Note
Note
|
|
|
|
Note |
|
|
|
Note
|
|
Note
|
|
Note
|
|
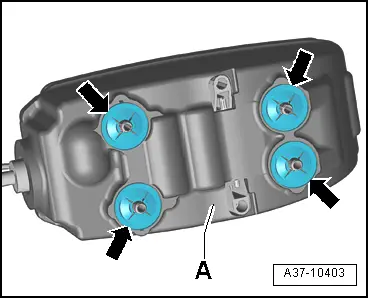
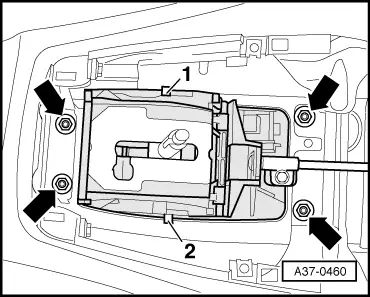
| Component | Nm |
| Selector mechanism to body | 8 |