| –
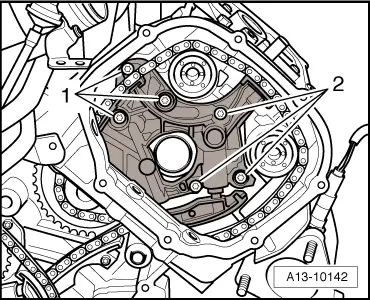
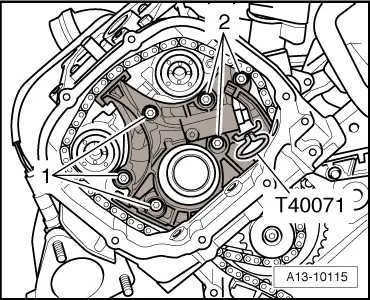
| Install chain tensioner on cylinder head (right-side) and position camshaft timing chain as shown in the illustration. |
| –
| Tighten bolts -1- and -2-. |
| Remaining installation steps are carried out in reverse sequence; note the following: |
| –
| Position timing chains on camshafts → Anchor. |
| –
| Install timing chain cover (bottom) → Chapter. |
| –
| Install crankshaft oil seal (gearbox end) → Chapter. |
| –
| Install timing chain covers (left and right) → Anchor. |
|
|

|
 Note
Note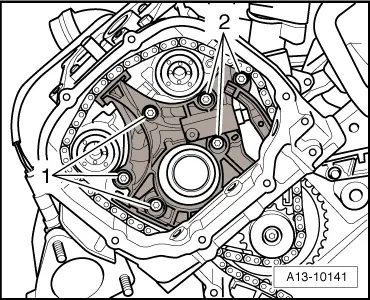
 Caution