audi Workshop Repair Guides

Audi Workshop Service and Repair Manuals

Removing and installing valve body > < Dismantling and assembling reverse gear clutch -K2-
Automatic gearbox 01N
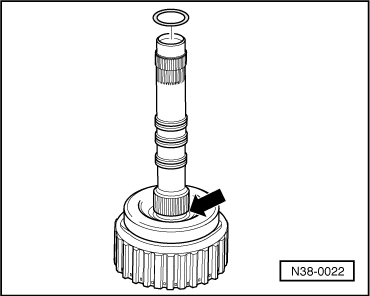
Dismantling and assembling 3rd and 4th gear clutch -K3- with turbine shaft
 
N38-0074

Note:

The clutch should only be dismantled for cleaning or to visually check parts.

  • Circlip
    • ◆ Different thickness
    • ◆ Do not mix up circlips for different clutches
    • ◆ Mark after removing and insert at same point
  • Thrust plate
    • ◆ Fitting location: smooth side facing plates
  • Inner plate
    • ◆ Quantity=>from Page 00-3
    • ◆ Soak new plates in ATF for 15 minutes before installing
 
N38-0074
  • Outer plate
    • ◆ Quantity=>from Page 00-3
  • Pressure plate
    • ◆ Peened to corrugated washer (item 6)
    • ◆ Install with peened corrugated washer facing piston
  • Corrugated washer
    • ◆ Peened to pressure plate (item 5)
  • Securing ring
    • ◆ Removing and installing
      => Fig.38-25
    • ◆ Different thickness
    • ◆ Do not mix up circlips for different clutches
    • ◆ Mark after removing and insert at same point
 
N38-0074
  • Piston cap
    • ◆ Is under strong spring pressure
    • ◆ Sealing lips are vulcanised to piston cap
    • ◆ Moisten with ATF before installing
    • ◆ When removing and installing press down and fit circlip (Item 7)
    • ◆ Removing and installing
      => Fig.38-25
  • Spring
    • ◆ Seat between piston and piston cap
  • Piston
    • ◆ Sealing lips are vulcanised to piston
    • ◆ Moisten with ATF before installing
    • ◆ Turn piston slightly when installing
 
N38-0074
  • Clutch housing with turbine shaft
    • ◆ Height varies according to number of inner and outer plates
    • ◆ Different versions according to gearbox code letters
  • O-ring
    • ◆ Renew
    • ◆ Installing
      =>Fig.38-26
  • Piston ring
    • ◆ Removing and installing
      => Fig.38-25
    • ◆ Check that it is correctly located
      => Fig. 38-26
 
W38-0001

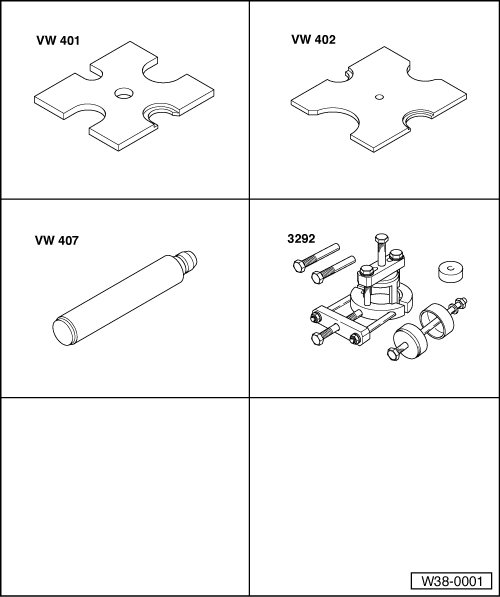
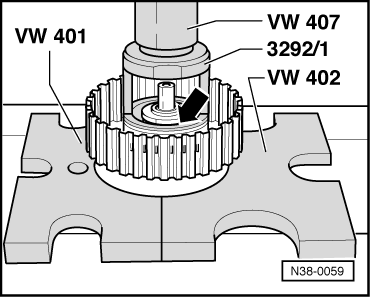
Special tools and workshop equipment required

  • ◆ Thrust plate VW 401
  • ◆ Thrust plate VW 402
  • ◆ Press tool VW 407
  • ◆ 3292/1 From assembly tool 3292
 
N38-0013

→ Fig1    Removing and installing piston ring

Removing

  • ‒ Press piston ring together and release by hand
  • ‒ Open out piston ring on both sides and take off; do not twist out of groove on one side.

Installing

  • ‒ Place piston ring in groove.
  • ‒ To hook ends together press sides of ring in and guide ends over one another.

 
N38-0059

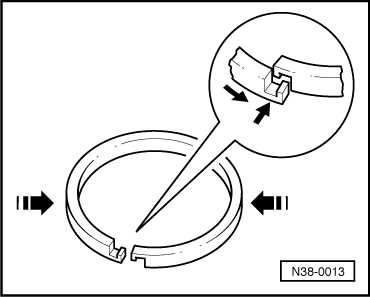
→ Fig.2    Removing and installing circlip

  • ‒ Press piston cap down carefully until the circlip -arrow- can be removed or installed.
  • ‒ Mark circlip after removing and reinstall in same position.
 
N38-0023

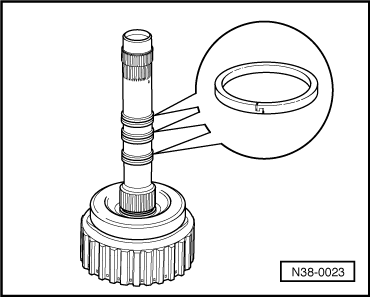
→ Fig.3    Checking seating of piston rings

  • ‒ Ensure that the ends of the piston rings are hooked together.

 
N38-0022

→ Fig.4    Installing O-ring

  • ‒ Insert O-ring in the groove in the turbine shaft -arrow-.

Removing and installing valve body > < Dismantling and assembling reverse gear clutch -K2-