audi Workshop Repair Guides

Audi Workshop Service and Repair Manuals

Dismantling and assembling 1st to 3rd gear clutch -K1- > < Dismantling and assembling ATF pump
Automatic gearbox 01N
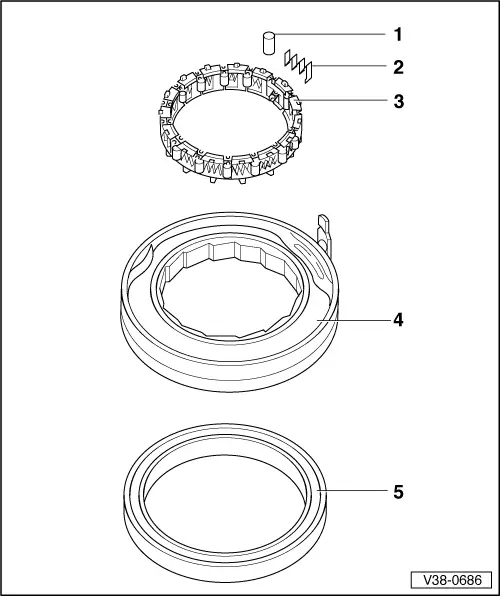
Dismantling and assembling free wheel with -B1- piston
 
V38-0686
  • Rollers
    • ◆ Installing
      => Fig.38-6
  • Springs
    • ◆ Installing
      => Fig.38-6
  • Cage
    • ◆ Removing and installing
      => Fig.38-6
    • ◆ Installation position
      => Fig.38-7
  • Outer ring
  • Piston
    • ◆ Sealing lips are vulcanised to the piston
    • ◆ To remove, use screwdriver to lever out of outer ring at several points
    • ◆ Moisten sealing lips with ATF before installing
    • ◆ Installation position
      => Fig.38-7
 
V38-0712

→ Fig.1    Removing and installing cage

Removing

  • ‒ Turn cage to the left as far as the stop.
  • ‒ Remove cage by pressing it up and out of the outer ring

Installing

  • ‒ Insert cage into outer ring.
    • ‒ Installation position => Fig.38-7
  • ‒ To secure cage, turn it to the right as far as the stop -arrow-.

 
N38-0058

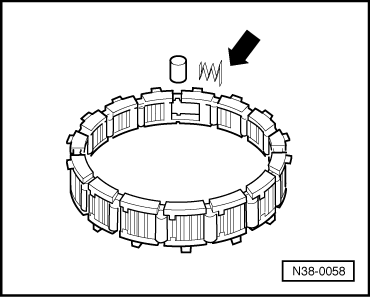
→ Fig.2    Installing rollers and springs

  • ‒ Insert springs so that the longer ends of the springs -arrow- engage in the cage.
  • ‒ Then insert roller between cage and spring.
 
V38-0714

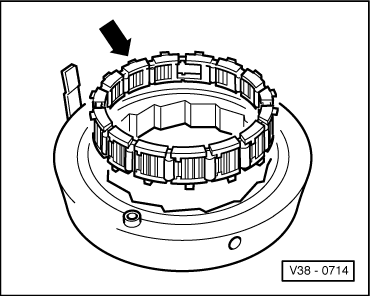
→ Fig.3    Fitting location of cage in outer ring

  • ‒ Install with large lugs (arrow) facing up.

 
V38-0713

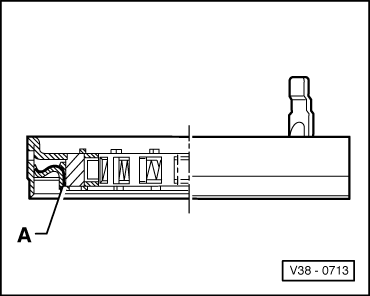
→ Fig.4    Installed position of piston

  • ‒ Insert piston -A- as shown.

Dismantling and assembling 1st to 3rd gear clutch -K1- > < Dismantling and assembling ATF pump