audi Workshop Repair Guides

Audi Workshop Service and Repair Manuals

Adjusting propshaft > < Removing and installing propshaft
Automatic Gearbox 01VFWD and 4WD
Servicing propshaft
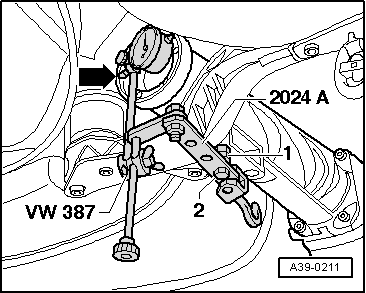
Measuring and marking radial run-out at propshaft flange
 
W00-0037

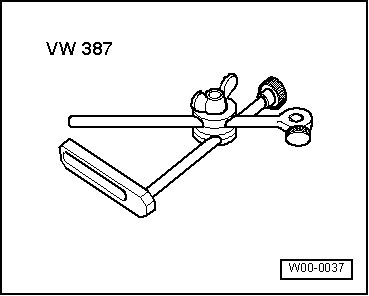
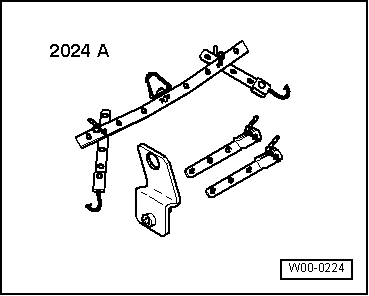
Special tools, testers and auxiliary equipment required

  • ◆ Universal dial gauge retainer VW 387

 
W00-0224
  • ◆ Lifting tackle 2024 A
  • ◆ Dial gauge
  • ◆ Bolt M10 x 85

Notes:

  • ◆ It is always necessary to measure radial run-out when thrust tube has been removed. Affix a new coloured dot and remove the old colour marking.
  • ◆ If a new propshaft is installed and if the marking on the flange shaft of the rear final drive is no longer visible the position of maximum radial run-out must be determined and marked by a coloured dot.
  • ◆ The coloured dot on the propshaft is positioned opposite the above coloured dot .
  • ◆ The radial run-out can be measured when rear final drive is installed but the propshaft must be disconnected at rear final drive. See notes => Page 39-74
  • ‒ Remove bolt on front left of rear gearbox support.
 
A39-0211
  • ‒ → Remove lug from lifting appliance 2024 A and secure it at free hole with an M10 x 85 mm bolt -2-. Use approx. 5 M12 nuts -1- as spacers.
  • ‒ Secure dial gauge bracket VW 387 to lug when it is secured in position.
  • ‒ Position dial gauge on ground diameter in propshaft flange -arrow- and set to "0" with 1 mm preload.
  • ‒ Rotate the differential by turning the two rear wheels (left and right flange shafts) simultaneously in one direction until the propshaft flange has undergone one complete revolution.
  • ‒ Mark the position of greatest radial run-out on flange exterior by a coloured dot (equates to greatest distance from rotational axis).
  • ‒ Remove old marking from propshaft flange.
  • ‒ Install propshaft => Page 39-81.

Adjusting propshaft > < Removing and installing propshaft