Audi Workshop Service and Repair Manuals
HOME
FEATURES
MENU
INDEX
ABOUT US
Adjusting handbrake >
< Removing and installing handbrake cables - four-wheel drive vehicles
A4 Mk2
Brake system
Brake, brake mechanics
Removing and installing handbrake lever with undertray
Removing and installing handbrake lever with undertray
Removing and installing handbrake lever with undertray
Removing
–
Remove centre console extension.
→ Rep. Gr.68
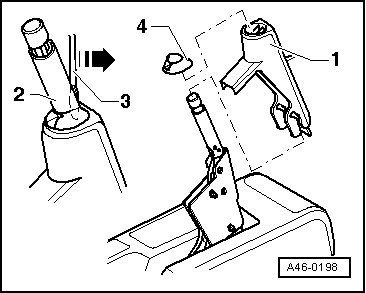
–
Release handle
-1-
with a screwdriver
-3-
and remove.
–
Remove cover
-4-
and handle
-1-
.
–
Unscrew hexagon bolts -2- and remove carrier
-1-
(tightening torque: 6 Nm).
–
Remove floor covers.
–
Detach underbody panel (left-side) - approx. 8 bolts.
–
Detach inner underbody panel at exhaust pipe.
–
Detach exhaust at rear.
–
Remove heat shield at rear of fuel tank.
–
Detach rear tunnel heat shield.
–
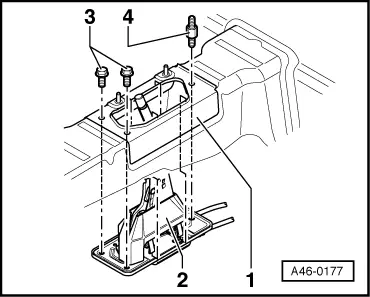
Disconnect the handbrake contact switch.
–
Remove bolts, Items 3 and 4.
–
Remove handbrake lever downwards.
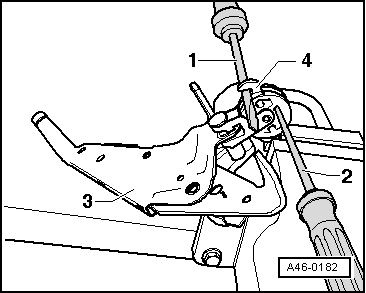
–
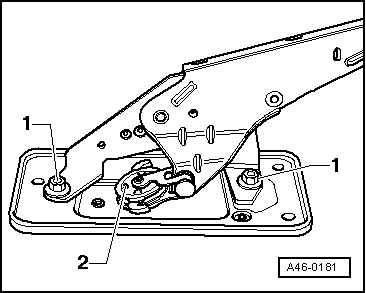
Remove flange nuts
-1-
(tightening torque 25 Nm).
–
Detach handbrake lever
-2-
from mounting plate.
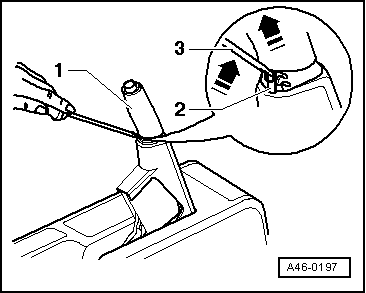
Resetting the adjustment mechanism
–
Clamp one of the spring-loaded hooks in a vice.
–
Release mechanism with a screwdriver
-2-
, at the same time pressing back the second spring-loaded hook with another screwdriver.
Installing
Installation is carried out in reverse sequence.
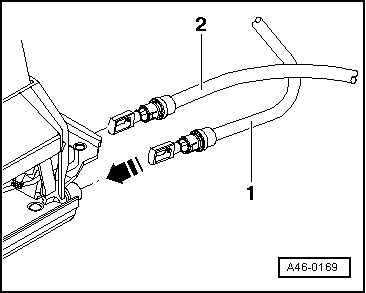
–
Insert handbrake cable into compensator (vehicles with front-wheel drive).
–
Insert handbrake cable into compensator (vehicles with four-wheel drive).
–
Tightening torque for hexagon bolt (Item 3): 25 Nm
–
Tightening torque for adapter with washer (Item 4): 25 Nm
–
Install centre console extension.
→ Rep. Gr.68
–
Adjust handbrake
→ Chapter
.
Brake system
Brake, brake mechanics
Removing and installing handbrake lever with undertray
Adjusting handbrake >
< Removing and installing handbrake cables - four-wheel drive vehicles