
A4 Mk2
|
|
|
 Note
Note |
|
|

|
|
|
|
|
Note
|
|
 WARNING
|

|
|
|
|
|
Note
|
|
Note
|
|
|
|
|
|
|
|
| Component | Nm |
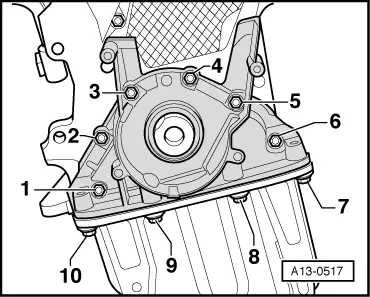
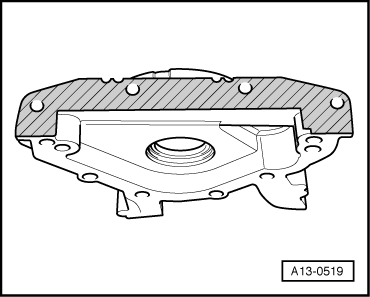
| Sealing flange to cylinder block | 15 |
| Toothed belt sprocket to crankshaft | 90 + 90° → Note → Note |
| Idler wheel to bracket for ancillary units | 25 |
| Stop for torque reaction support to lock carrier | 28 |
|