audi Workshop Repair Guides

Audi Workshop Service and Repair Manuals

Stress-free alignment of exhaust system > < Removing and installing particulate filter - vehicles with manual gearbox
Removing and installing particulate filter - vehicles with multitronic gearbox
   
Removing
  Note
All cable ties which are released or cut open when removing must be fitted in the same position when installing.
–  Pull off engine cover panel -arrows-.
–  Remove Lambda probe → Rep. Gr.23.
  A10-10294
–  Vehicles with auxiliary heater: remove bolts -arrows- securing exhaust pipe for auxiliary/additional heater to noise insulation.
  A10-0407
–  Open quick-release fasteners -1 … 3- and take off front and rear noise insulation.
  A10-1320
–  Unscrew nuts -arrows-.
  Note
Disregard -item 1-.
  A26-10499
–  Remove bolts -1- and -2- on bracket for front exhaust pipe.
  A26-10502
–  Disconnect exhaust system at clamp -arrow-.
–  Detach front exhaust pipe from threaded pins on particulate filter.
  A26-10015
–  Detach vacuum line -3-.
  Note
Disregard items marked -1- and -2-.
  A26-10112
–  Unscrew bolts -1- and nuts -2-.
–  Remove bolts -arrows-.
–  Remove exhaust gas recirculation cooler and lay it aside with coolant hoses connected.
  A26-10113
–  Unscrew threaded pin -1- from exhaust manifold.
  Note
Disregard -item 2-.
  A26-10503
–  Take electrical connector -1- for temperature sender before particulate filter -G506- out of bracket.
–  Unplug electrical connector and move wiring clear.
–  Unplug electrical wiring at exhaust gas pressure sensor 1 -G450--item 2-.
–  Unscrew nut and detach exhaust gas pressure sensor 1 -G450- from bracket.
–  Leave hoses connected and move exhaust gas pressure sensor 1 -G450- clear towards bottom of vehicle.
  A23-10123
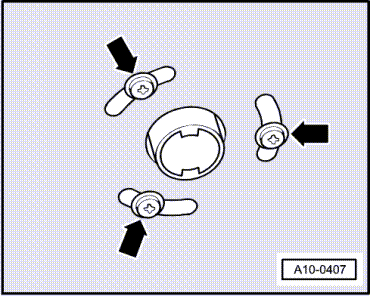
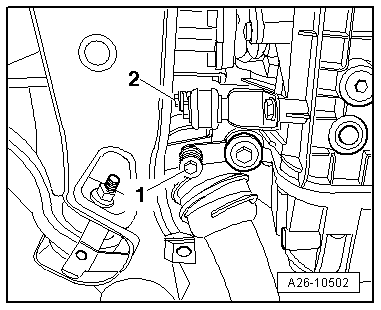
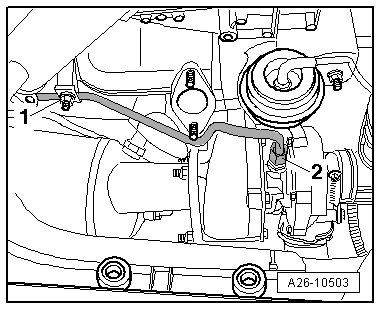
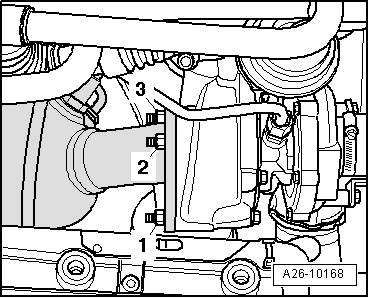
–  Unscrew nuts -1 ... 3- and lift out particulate filter.
Installing
Installation is carried out in the reverse order; note the following:
  Note
t  Renew gaskets and self-locking nuts.
t  Hose connections and hoses for charge air system must be free of oil and grease before assembly.
t  Secure all hose connections with the correct type of hose clips (same as original equipment) → Electronic parts catalogue.
t  To ensure that the charge air hoses can be properly secured at their connections, spray rust remover onto the worm thread of used hose clips before installing.
t  Fit all cable ties in the original positions when installing.
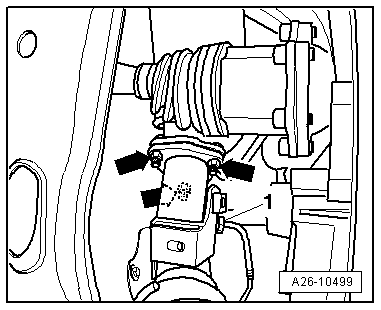
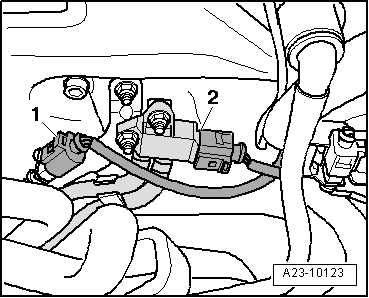
–  Install temperature sender before particulate filter -G506- → Chapter.
–  Install front exhaust pipe → Chapter.
–  Install Lambda probe → Rep. Gr.23.
–  Align exhaust system so it is free of stress → Chapter.
–  After renewing particulate filter, perform "Adaption" in “Guided Fault Finding” mode → Vehicle diagnosis, testing and information system VAS 5051.
Tightening torques
  A26-10168
ComponentNm
Particulate filter to front exhaust pipe25 1)2)
Bracket for front exhaust pipe to gearbox25
Hose clips (9 mm wide)3
Hose clips (13 mm wide)5.5
l  1) Renew nuts.
l  2) Coat threads and contact surface with high-temperature paste; for high-temperature paste refer to → Electronic parts catalogue.


Stress-free alignment of exhaust system > < Removing and installing particulate filter - vehicles with manual gearbox