audi Workshop Repair Guides

Audi Workshop Service and Repair Manuals

Removing and installing dual-mass flywheel - vehicles with manual gearbox > < Renewing crankshaft oil seal - pulley end
Removing and installing sealing flange (front)
Special tools and workshop equipment required
   
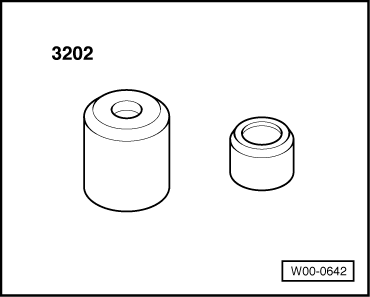
t  Fitting sleeve -3202/1-
  W00-0642
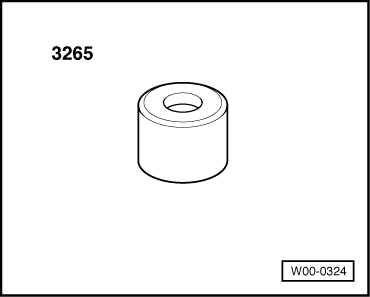
t  Fitting sleeve -3265-
t  Locking fluid → Parts catalogue
  W00-0324
Removing
  Caution
Observe notes on procedure for disconnecting the battery → Electrical system; Rep. Gr.27.
–  Disconnect earth wire at battery with ignition switched off.
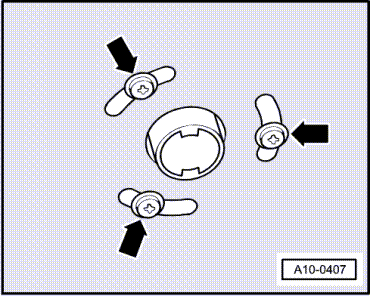
–  Vehicles with auxiliary heater: remove bolts -arrows- securing exhaust pipe for auxiliary/additional heater to noise insulation.
  A10-0407
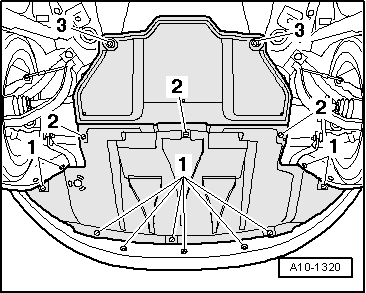
–  Open quick-release fasteners -1 … 3- and take off front and rear noise insulation.
–  Remove front bumper cover → General body repairs, exterior; Rep. Gr.63.
–  Move lock carrier into its service position → General body repairs, exterior; Rep. Gr.50.
  A10-1320
–  Remove toothed belt → Chapter.
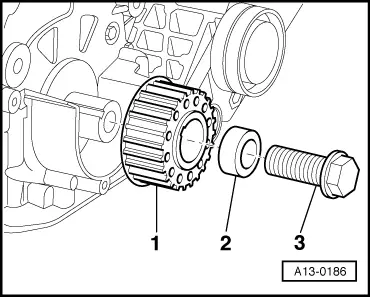
–  Unscrew central bolt -3- for crankshaft sprocket -1-.
–  Detach spacer sleeve -2- and toothed belt sprocket.
–  Remove top section of sump → Chapter.
  A13-0186
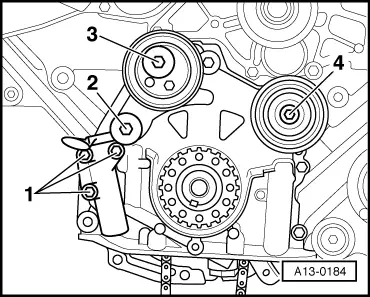
–  Remove idler roller -4-, tensioning roller -3-, tensioning lever -2- and tensioner -1-.
  A13-0184
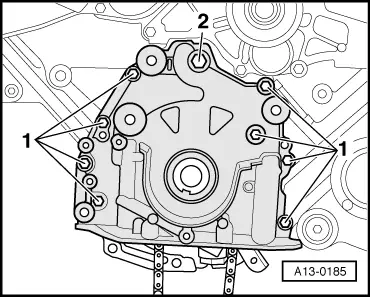
–  Remove bolts -1- and -2-.
–  Pull off sealing flange (front).
–  Drive out oil seal with flange removed.
  A13-0185
Installing
Installation is carried out in the reverse order; note the following:
  Note
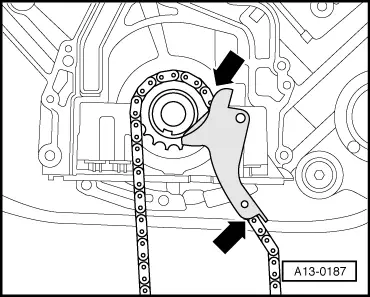
t  Before installing sealing flange, check position of drive chain for oil pump. Chain must make contact with guide rail of chain tensioner -arrows-.
t  If the sealing flange is installed with the oil seal already fitted, place fitting sleeve -3202/1- on end of crankshaft before installing sealing flange.
–  Clean sealing surfaces before installing sealing flange.
  A13-0187
–  Apply locking fluid to bolt -2- and insert bolt.
–  Tighten bolts -1- and -2-.
  Note
Do not lubricate sealing lip and outer rim of oil seal before pressing in.
–  Push on oil seal using fitting sleeve -3202/1-.
  A13-0185
–  Press in oil seal until flush using the centre bolt and fitting sleeve -3265-.
  Note
Fit spacer sleeve on central bolt.
–  Install idler roller.
l  Installation position: recess in mounting hole (for bolt head) faces outwards.
–  Pay attention to washers fitted behind tensioning roller and tensioning lever.
–  Install sump (top section) → Anchor.
  V13-0867
–  Install crankshaft sprocket -1- with spacer sleeve -2- and new central bolt -3-.
  Note
t  Contact surface between toothed belt sprocket and crankshaft must be free of oil.
t  Do not lubricate bolt for crankshaft sprocket.
–  Install toothed belt (adjust valve timing) → Anchor.
–  Install poly V-belt for power steering pump, alternator and viscous fan. → Anchor
–  Install viscous fan → Chapter.
–  Install lock carrier with attachments → General body repairs, exterior; Rep. Gr.50.
–  Install front bumper cover → General body repairs, exterior; Rep. Gr.63.
–  Observe notes on procedures required after connecting battery → Electrical system; Rep. Gr.27.
Tightening torques
  A13-0186
ComponentNm
Front sealing flange to cylinder blockM610
M830
Toothed belt sprocket to crankshaft200 + 180° → Note → Note
Toothed belt tensioning roller to sealing flange (front)42
Tensioner to sealing flange (front)10
Tensioning lever to sealing flange (front)42
Idler roller to sealing flange (front)45

1)  Renew bolt.
2)  180° = one half turn.
   

Removing and installing dual-mass flywheel - vehicles with manual gearbox > < Renewing crankshaft oil seal - pulley end