Note | All cable ties which are released or cut open when removing must be fitted in the same position when installing. |
| –
| Move lock carrier to service position → Chapter. |
| –
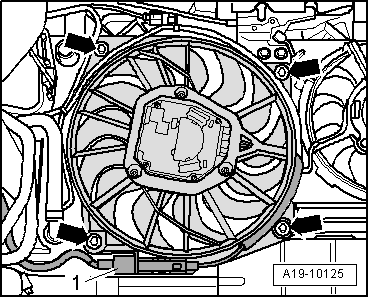
| Unplug electrical connector -1-. |
| –
| Move wiring harness clear at radiator fan (left-side). |
| –
| Detach radiator fan (left-side). |
| Installation is carried out in the reverse order; note the following: |

Note | t
| Fit all cable ties in the original positions when installing. |
| t
| Hose connections and hoses for charge air system must be free of oil and grease before assembly. |
| t
| To ensure that the charge air hoses can be properly secured at their connections, spray rust remover onto the worm thread of used hose clips before installing. |
|
|

|
 Note
Note Note
Note
 Note
Note Note
Note