audi Workshop Repair Guides

Audi Workshop Service and Repair Manuals

Renewing oil seal for rear splined shaft - vehicles with vibration damper on rear splined shaft > < Renewing oil seal for flange shaft (rear) on gearbox
Renewing oil seal for rear splined shaft - vehicles without vibration damper on rear splined shaft
Special tools and workshop equipment required
   
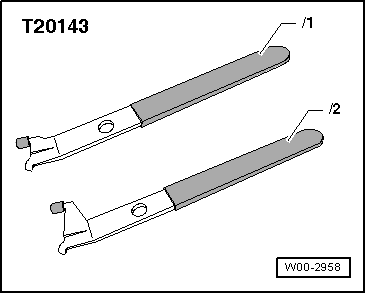
t  Extractor tool -T20143-
  W00-2958
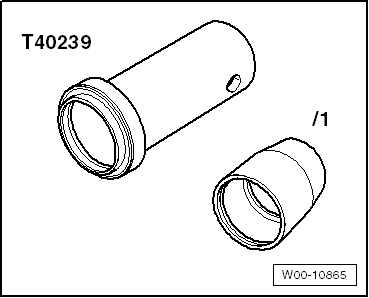
t  Assembly tool -T40239-
t  Sealing grease -G 052 128 A1-
Procedure
–  Remove propshaft → Rear final drive 0BC; Rep. gr.39 or → Rear final drive 0BF and 0BE - sport differential; Rep. gr.39.
  W00-10865
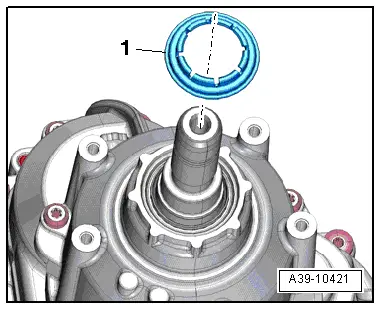
–  Pry off dust ring -1-.
  Note
The dust ring cannot be removed without being damaged.
  A39-10421
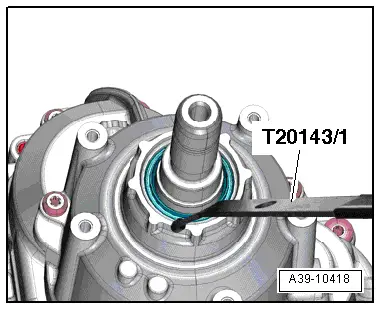
–  Pull out oil seal for rear splined shaft.
–  Clean contact surface and sealing surface.
–  Lightly lubricate outer circumference of oil seal with gear oil.
  A39-10418
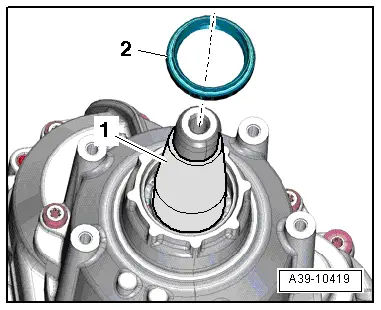
–  Fit guide sleeve -T40239/1--item 1- onto rear splined shaft.
–  Pack space between sealing lip and dust lip half-full with sealing grease -G 052 128 A1-.
–  Push oil seal -2- over guide sleeve -item 1- and onto rear splined shaft.
l  Installation position: the open side of the seal should face the gearbox housing.
  A39-10419
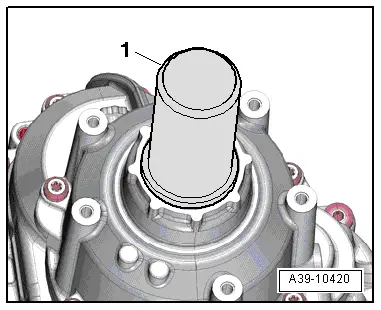
–  Drive in oil seal as far as stop using thrust piece -T40239-, -item 1- of assembly tool -T40239-. Make sure oil seal remains straight.
  Note
Pull guide sleeve -T40239/1- carefully out of oil seal so that sealing lip is not rolled back.
  A39-10420
–  Clip on new dust ring -1-.
–  Install propshaft → Rear final drive 0BC; Rep. gr.39 or → Rear final drive 0BF and 0BE - sport differential; Rep. gr.39.
–  Checking gear oil level → Chapter
  A39-10421

Renewing oil seal for rear splined shaft - vehicles with vibration damper on rear splined shaft > < Renewing oil seal for flange shaft (rear) on gearbox