If a used timing chain rotates in the opposite direction when it is refitted, this can cause breakage.
Mark running direction of timing chains (left and right) with paint for re-installation. Do not mark timing chain by means of centre punch, notch or the like.
–
Remove locking pin -T40071- and detach camshaft timing chain (left-side).
–
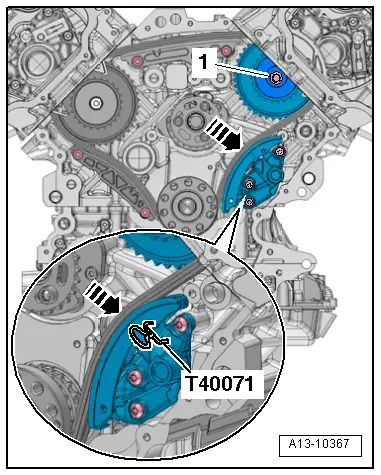
Remove bolts -1- and -2- and take off chain tensioner (right-side).
–
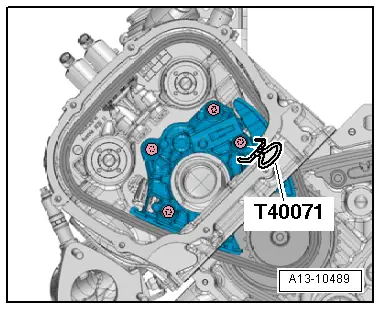
Press guide rail of chain tensioner for drive chain for valve gear in direction of -arrow- and lock chain tensioner by inserting locking pin -T40071-.
–
Slacken off bolt -1- for drive sprocket approx. 1 turn.
–
Tilt drive sprocket with bearing mounting slightly to one side and lift off camshaft timing chain (right-side).
Note the correct installation position if the tensioning element has been removed from the chain tensioner: drilling in base of housing faces chain tensioner and piston faces tensioner rail.
t
Renew the bolts tightened with specified tightening angle.
Caution
Avoid damage to valves and piston crowns.
The crankshaft must not be at “TDC” at any cylinder when the camshafts are turned.
–
Position timing chain (left-side) as shown in the illustration (according to marks applied when removing).
–
Press down guide rail of chain tensioner for timing chain (left-side) and lock chain tensioner by inserting locking pin -T40071-.
–
Guide timing chain (right-side) past bearing mounting for drive sprocket (note marks applied when removing).
–
Tighten bolt -1- for bearing mounting.
–
Remove locking pin -T40071-.
–
Fit chain tensioner on cylinder head (right-side) and position timing chain.
–
Tighten bolts -1- and -2-.
Remaining installation steps are carried out in reverse sequence; note the following:
 Caution
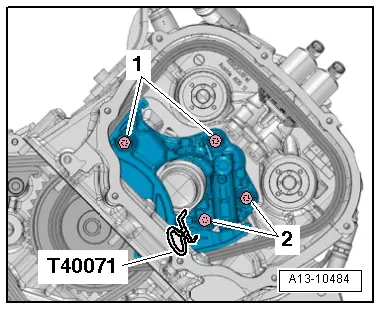
 Note
Note