audi Workshop Repair Guides

Audi Workshop Service and Repair Manuals

Removing and installing alternator - vehicles with 2.7 ltr. and 3.0 ltr. TDI engine without auxiliary heater > < Exploded view of alternator with sliding bushes
Removing and installing alternator - vehicles with 2.0 ltr. TDI engine
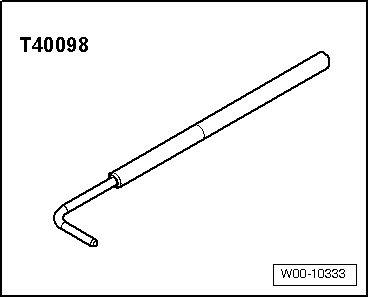
Special tools and workshop equipment required
   
t  Locking tool -T40098-
  W00-10333
Removing
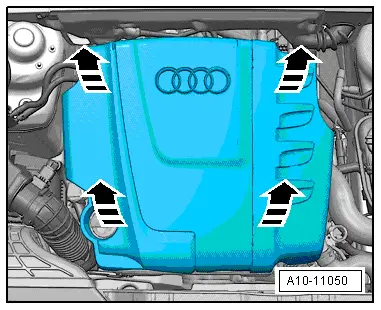
–  Detach engine cover panel -arrows-.
  A10-11050
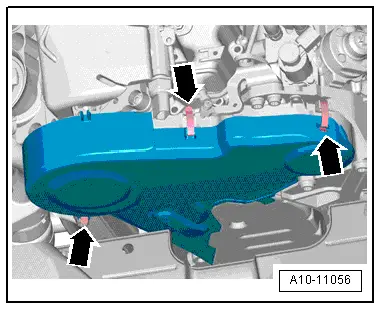
–  Unfasten retaining clips -arrows- and remove toothed belt cover (top).
  A10-11056
  Caution
Risk of breakage if the poly V-belt runs in the opposite direction when refitted.
Before removing, mark direction of operation of poly V-belt with chalk or felt-tipped pen in preparation for re-installation.
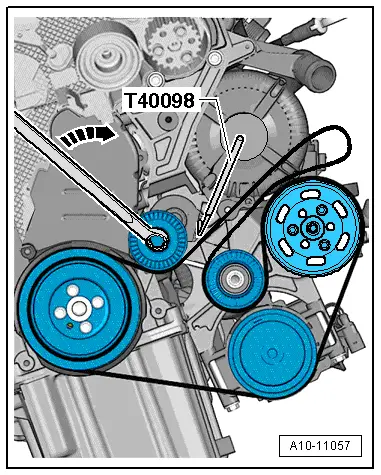
–  To slacken poly V-belt turn tensioner in direction of -arrow-.
–  Remove poly V-belt from alternator pulley.
–  Secure tensioner with locking tool -T40098-.
  A10-11057
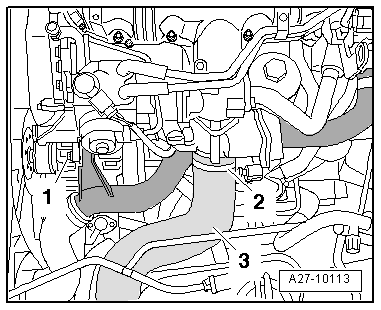
–  Release hose clip -2- and detach air hose -3- from throttle valve module -J338-.
–  Remove bolt -1-.
  A27-10113
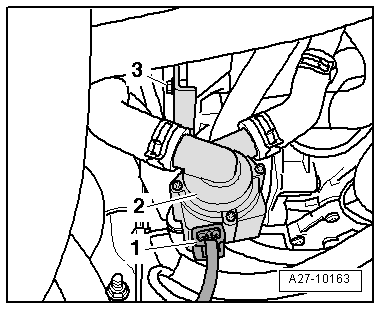
–  Unscrew nut -3- and unplug electrical connector -1-.
–  Detach continued coolant circulation pump -V51--item 2- with retainer and move clear to one side (with coolant hoses attached).
  A27-10163
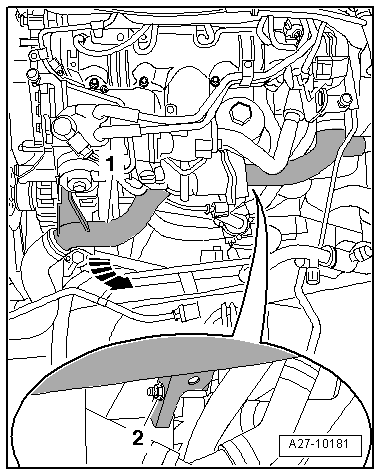
–  Unscrew centre hex stud -2- and pull coolant pipe -1- (with hoses connected) in direction of -arrow-.
  A27-10181
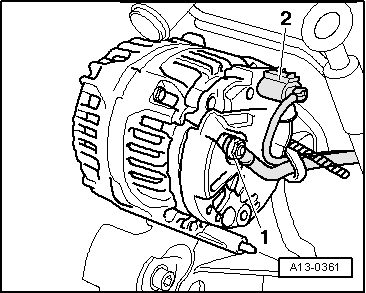
–  Unscrew terminal 30/B+ -item 1-.
–  Unplug electrical connector -2-.
  A13-0361
–  Unscrew bolts -arrows-.
  Note
t  If you cannot remove the bolts, press radiator cowl forwards slightly.
t  If alternator sticks in retainer, screw bolt back in again down to the last 2 turns.
t  Tap carefully on bolt heads with flat side of hammer to release bushes of alternator mount.
–  Pull coolant pipe to one side and detach alternator -1-.
Installing
l  Tightening torque → Chapter
Installation is carried out in the reverse order; note the following:
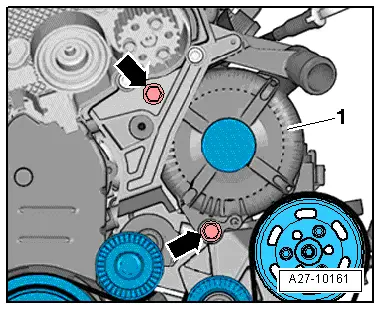
–  To facilitate positioning of alternator, drive back bushes for securing bolts slightly.
  Note
Stiff alternator mount bushes must be freed; otherwise the clamping force of the bush will not be adequate even when the bolts are tightened to the correct torque.
  A27-10161
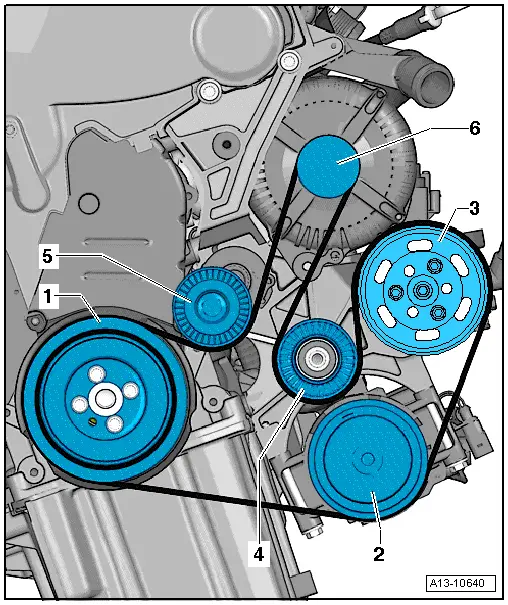
–  Fit poly V-belt onto pulleys in the following sequence:
1 - Vibration damper
2 - Air conditioner compressor
3 - Power steering pump
4 - Idler roller
5 - Tensioner
6 - Alternator
  Note
When installing poly V-belt, make sure it is properly seated on pulleys.
–  Connect battery. Steps required → Anchor.
–  Start engine and check that belt runs properly.
  A13-10640

Removing and installing alternator - vehicles with 2.7 ltr. and 3.0 ltr. TDI engine without auxiliary heater > < Exploded view of alternator with sliding bushes