audi Workshop Repair Guides

Audi Workshop Service and Repair Manuals

Removing and installing washer fluid level senderG33 > < Removing and installing filler neck for washer fluid reservoir
Removing and installing washer fluid reservoir
Special tools and workshop equipment required
t  Drip tray
Removing
–  Switch off ignition and take out ignition key.
–  Remove filler neck for washer fluid reservoir → Chapter.
–  Remove front wheel (left-side).
–  Remove front wheel housing liner (left-side) → Rep. gr.66.
   
–  Place drip tray under washer fluid reservoir.
–  Pull release tab and detach hose connector -1- from washer fluid hose -3- for headlight washer system.
–  Cut through cable ties -2- and -4-.
–  Detach plastic wedge -5-.
  A92-10079
–  Unplug electrical connectors -7- and -8-.
–  Release retaining clip and disconnect washer fluid hoses from washer pump -9- for windscreen washer system.
–  Detach wiring harness -2- from retainers on washer fluid reservoir.
–  Remove bolts -1- and -3-.
–  Pull washer fluid reservoir forwards slightly.
–  Unplug electrical connector -5-.
–  Detach washer fluid hose -6- for headlight washer system and wiring harness -4- from retainers on washer fluid reservoir.
–  Detach washer fluid reservoir.
  A92-10088
Installing
l  Tightening torque and tightening sequence → Fig..
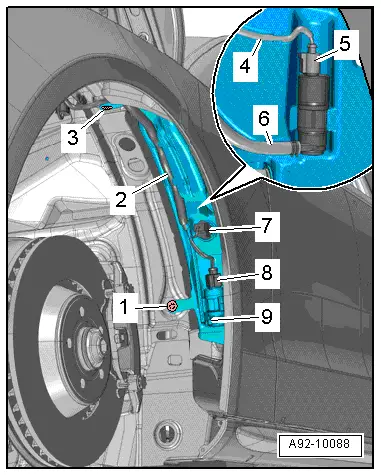
–  When installing washer fluid reservoir, make sure that locating lug -1- engages in recess -2- on wing panel.
Installation is carried out in the reverse order; note the following:
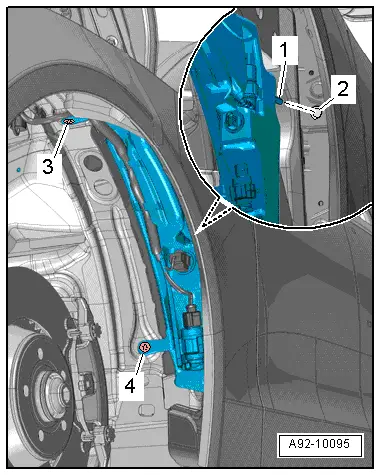
–  Install front wheel housing liner (left-side) → Rep. gr.66.
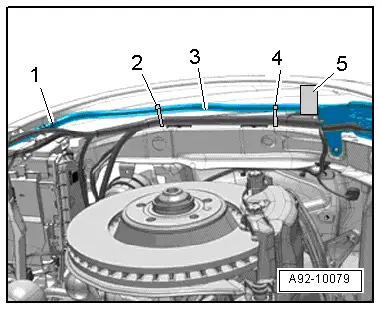
–  Install filler neck for washer fluid reservoir → Chapter.
  A92-10095

Removing and installing washer fluid level senderG33 > < Removing and installing filler neck for washer fluid reservoir