audi Workshop Repair Guides

Audi Workshop Service and Repair Manuals

Removing and installing onboard supply control unitJ519 > < Removing and installing 3-position relay and fuse carrier
Removing and installing 4-position relay and fuse carrier with screw connection
   
Removing
–  Switch off ignition and take out ignition key.
–  Remove dash panel trim (driver's side) → Rep. gr.68.
–  Press retaining springs in direction of -arrow-, disengage 3-position relay and fuse carrier -1- and detach.
  A97-10477
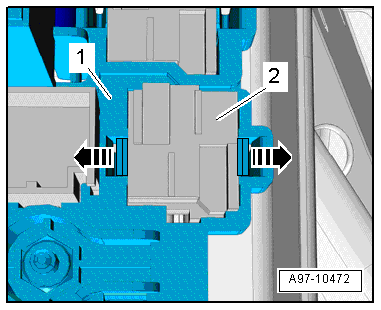
–  Before removing, mark electrical wiring -1- and -2- for re-installation.
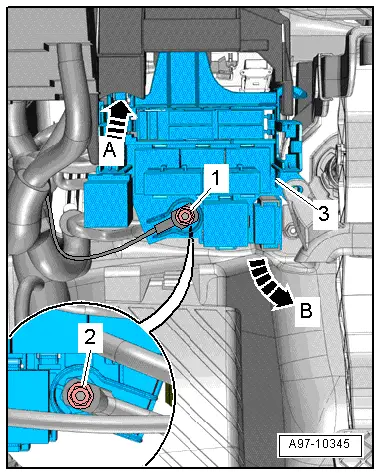
–  Disconnect electrical wire -1- on 4-position relay and fuse carrier.
–  Release retaining spring -arrow A- and swivel relay and fuse carrier -3- out of mounting -arrow B-.
–  Disconnect electrical wire -2- on back of 4-position relay and fuse carrier.
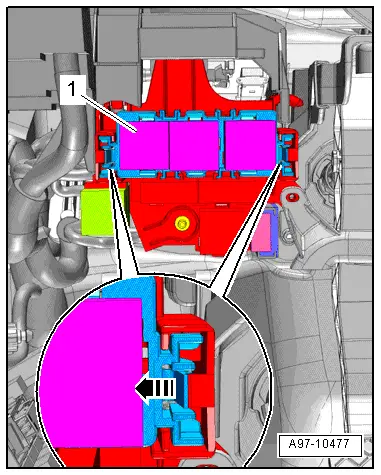
–  Unclip fuse holders at relay carrier.
  A97-10345
–  Pull out relays and control units.
–  Release retaining clips -arrows- and press relay carrier -2- towards rear out of holder -1-.
  Note
Exact assignment of contacts in 4-position relay and fuse carrier with screw connection can be found in appropriate current flow diagram → Current flow diagrams, Electrical fault finding and Fitting locations.
Installing
l  Tightening torque → Fig.
Installation is carried out in the reverse order; note the following:
–  Install dash panel trim (driver's side) → Rep. gr.68.
  A97-10472

Removing and installing onboard supply control unitJ519 > < Removing and installing 3-position relay and fuse carrier