| –
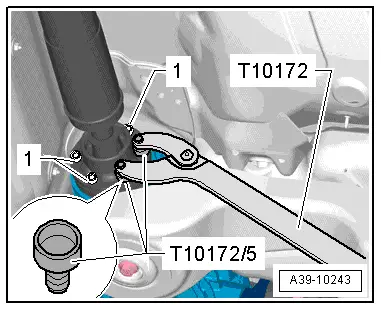
| Remove bolts -1- (6x) on rear CV joint. |
| –
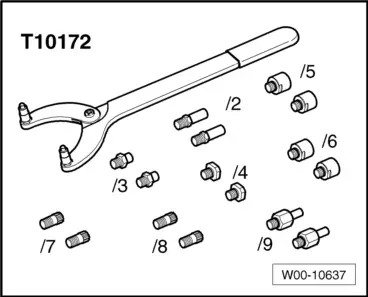
| Use counterhold tool -T10172- with adapters -T10172/5-. |
| –
| Separate propshaft from rear final drive and tie up to one side on subframe. |
| Attaching propshaft to rear final drive |
| Perform installation in reverse sequence of removal. Note the following: |
| t
| Remove old, dried-out high-temperature grease from CV joint and flange for propshaft. Put in exactly the same quantity of fresh high-temperature grease -G 000 633-. |
| t
| Clean remaining locking fluid out of tapped holes in flange shaft on rear final drive. The threads can be cleaned with a thread tap. Otherwise the securing bolts can shear off when they are screwed in. |
| t
| After detaching the propshaft from the rear final drive, the additional balancing washer (thicker washer) that may be fitted between the lock plate and one of the securing bolts must not be reinstalled. |
| t
| Always install new securing bolts for propshaft (self-locking bolts). |
| t
| Check for damage to gasket for propshaft on rear final drive flange (kinked gasket or partially detached rubber coating). A damaged gasket must be renewed. |
|
|
|
 Note
Note