
A5
| Removing and installing pressure plate and clutch plate („LuK“ version) |

| Special tools and workshop equipment required |
| t | Thrust plate -VW 402- |
| t | Press tool -VW 412- |
| t | Thrust pad -VW 510- |
| t | Assembly tool -T10254- |
| t | Thrust piece -T40089- |
|
|
|
|
| Removing |
| – | Remove clutch module → Chapter. |

| 1 - | Clutch pressure plate |
 Caution
|
| – | Position the clutch module so that the thrust pad -VW 510- makes contact with the bearing washer -arrow A- in the dual-mass flywheel. |
| – | Place the assembly tool -T10254/3- on the spring tongues in the diaphragm of the pressure plate -1- and apply the press. |
| l | Distance of travel: dimension -x- = 8 to 9 mm |
 Note
Note| A second mechanic is required for the next step. |
| – | Remove all 6 bolts -2- and release press. |
| – | Remove pressure plate -1- and clutch plate. |
Note
|
|
| – | Position the clutch module so that the thrust pad -VW 510- makes contact with the bearing washer -arrow A- in the dual-mass flywheel. |

| 1 - | Clutch pressure plate |
Caution
|
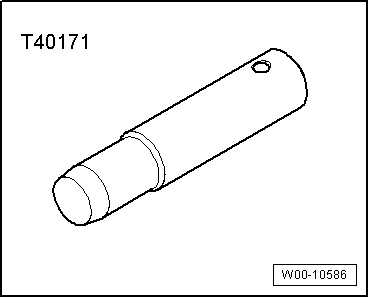
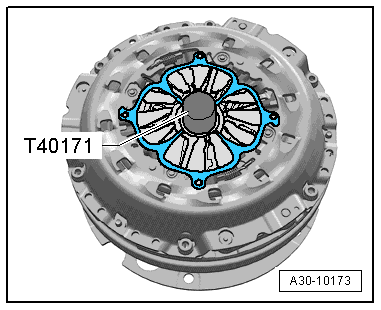
| – | Place assembly tool -T10254/3- over centring mandrel -T40171-. |
| – | Apply press until pressure plate -1- just makes contact with dual-mass flywheel -3--arrows C-. |
Note| A second mechanic is required for the next step. |
| – | Screw in each of the 6 bolts -2- in succession and tighten to final torque. |
| – | Release press. |
| – | Install clutch module → Chapter. |