audi Workshop Repair Guides

Audi Workshop Service and Repair Manuals

Removing and installing exhaust manifold (right-side) > < Exhaust manifold - exploded view
Removing and installing exhaust manifold (left-side)
   
Removing
–  Remove plenum chamber partition panel → Rep. Gr.50.
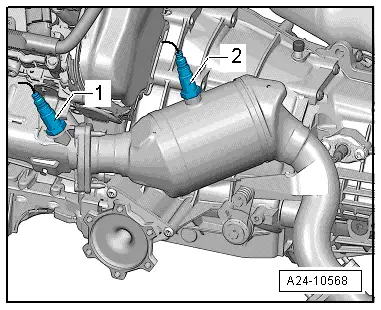
–  Unscrew Lambda probe 2 -G108--item 1- → Rep. Gr.24.
–  Remove engine mounting (left-side) → Chapter.
–  Remove front silencer (left-side) → Chapter.
  A24-10568
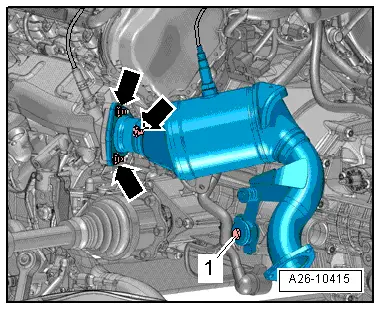
–  Remove nuts -arrows- and bolt -1-.
–  Detach catalytic converter (left-side) from exhaust manifold and move clear to the side.
  Note
For illustration purposes, the installation position is shown with the engine removed.
  A26-10415
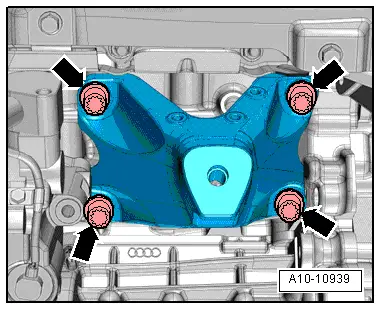
–  Unscrew bolts -arrows- and remove engine support (left-side).
  A10-10939
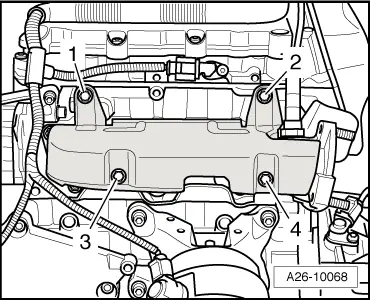
–  Remove bolts -1 … 4- and detach heat shield.
  A26-10068
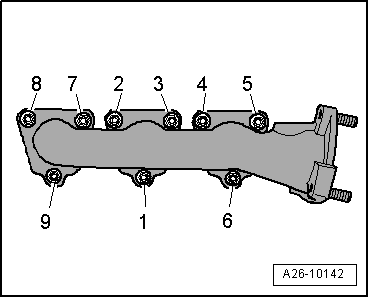
–  Remove nuts -1- and -8- and detach bracket for heat shield.
–  Remove nuts -2 … 7- and -9- and detach exhaust manifold.
Installing
Installation is carried out in the reverse order; note the following:
  Note
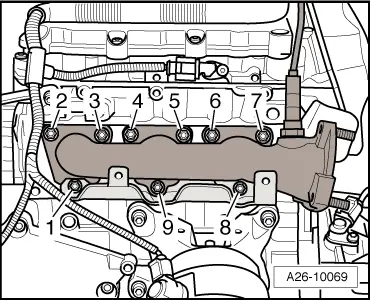
Renew gasket and self-locking nuts.
  A26-10069
–  Fit exhaust manifold with gasket for catalytic converter and tighten nuts → Fig..
–  Install engine support with engine mounting (left-side) → Chapter.
–  Install Lambda probe 2 -G108- → Rep. Gr.24.
–  Install catalytic converter (left-side): vehicles with manual gearbox → Chapter, vehicles with multitronic gearbox 0AW/automatic gearbox 0B6 → Chapter.
–  Install front silencer (left-side) → Chapter.
–  Install noise insulation → Rep. Gr.66.
–  Install plenum chamber partition panel → Rep. Gr.50.
  A26-10142

Removing and installing exhaust manifold (right-side) > < Exhaust manifold - exploded view