
A5
| Exploded view of wheel bearing housing, wheel bearing unit |
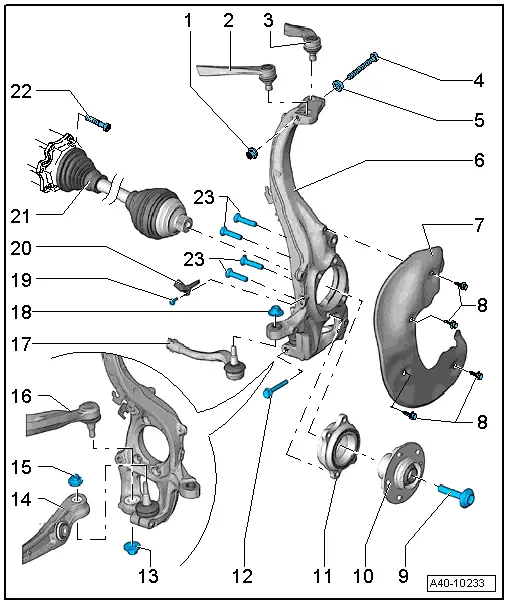
| 1 - | Nut |
| q | 40 Nm |
| q | Always renew if removed |
| 2 - | Upper link (front) |
| 3 - | Upper link (rear) |
| 4 - | Bolt |
| q | Always renew if removed |
| 5 - | Washer |
| 6 - | Wheel bearing housing |
| q | Removing and installing → Chapter |
| q | Different versions; for correct version, refer to → Electronic parts catalogue |
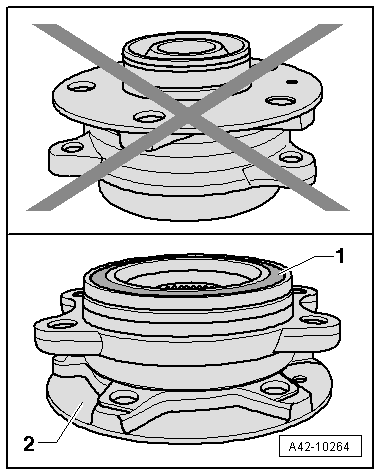
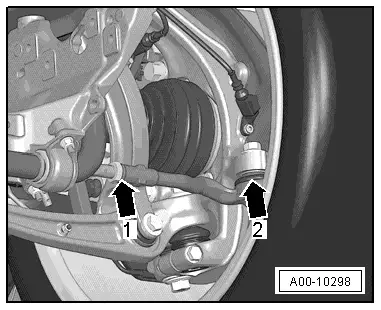
| q | Distinguishing feature → Anchor |
 WARNING
|
| 7 - | Splash plate for brakes |
| 8 - | Bolt |
| q | 10 Nm |
| 9 - | Bolt |
| q | 200 Nm +180° |
| q | Always renew if removed → Chapter |
| q | Before securing, clean the threads in the CV joint using a thread tap |
| 10 - | Wheel hub |
| q | Removing and installing → Chapter |
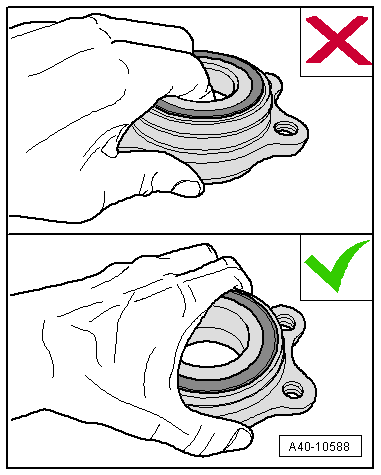
| 11 - | Wheel bearing |
| q | Removing and installing → Chapter |
 Caution
|
| 12 - | Bolt |
| q | 40 Nm |
| q | Always renew if removed |
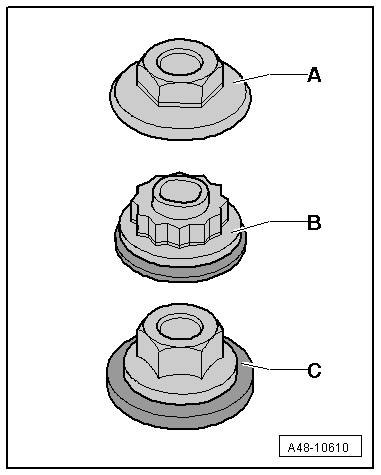
| 13 - | Nut |
| q | Always renew if removed |
| q | Different versions; for correct version, refer to → Electronic parts catalogue |
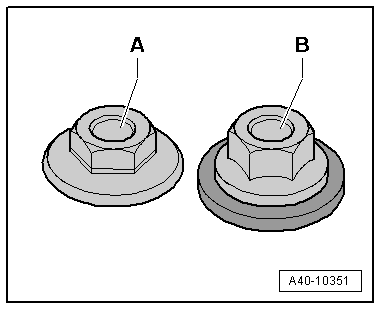
| q | Note different nut versions and tightening torques → Anchor |
| q | After detaching guide link from wheel bearing housing, remove residual adhesive from thread of joint pin. |
| 14 - | Track control link |
| q | Different versions; for correct version, refer to → Electronic parts catalogue |
| 15 - | Nut |
| q | Always renew if removed |
| q | Different versions; for correct version, refer to → Electronic parts catalogue |
| q | Note different nut versions and tightening torques → Anchor |
| q | After detaching swivel joint from wheel bearing housing, remove residual adhesive from thread of joint pin. |
| 16 - | Guide link |
| q | Different versions; for correct version, refer to → Electronic parts catalogue |
| 17 - | Track rod ball joint |
| q | Different versions; for correct version, refer to → Electronic parts catalogue |
| 18 - | Nut |
| q | Different versions; for correct version, refer to → Electronic parts catalogue |
| q | Note different nut versions and tightening torques → Anchor |
| q | Always renew if removed |
| 19 - | Bolt |
| q | 9 Nm |
| 20 - | Speed sensor |
| 21 - | Drive shaft |
| 22 - | Bolt |
| q | 70 Nm |
| q | Always renew if removed |
| 23 - | Countersunk bolts |
| q | 80 Nm +90° |
| q | Always renew if removed |
|
|
|
|
|
|
|
|