
1 Series E87 123d (N47S) 5-door
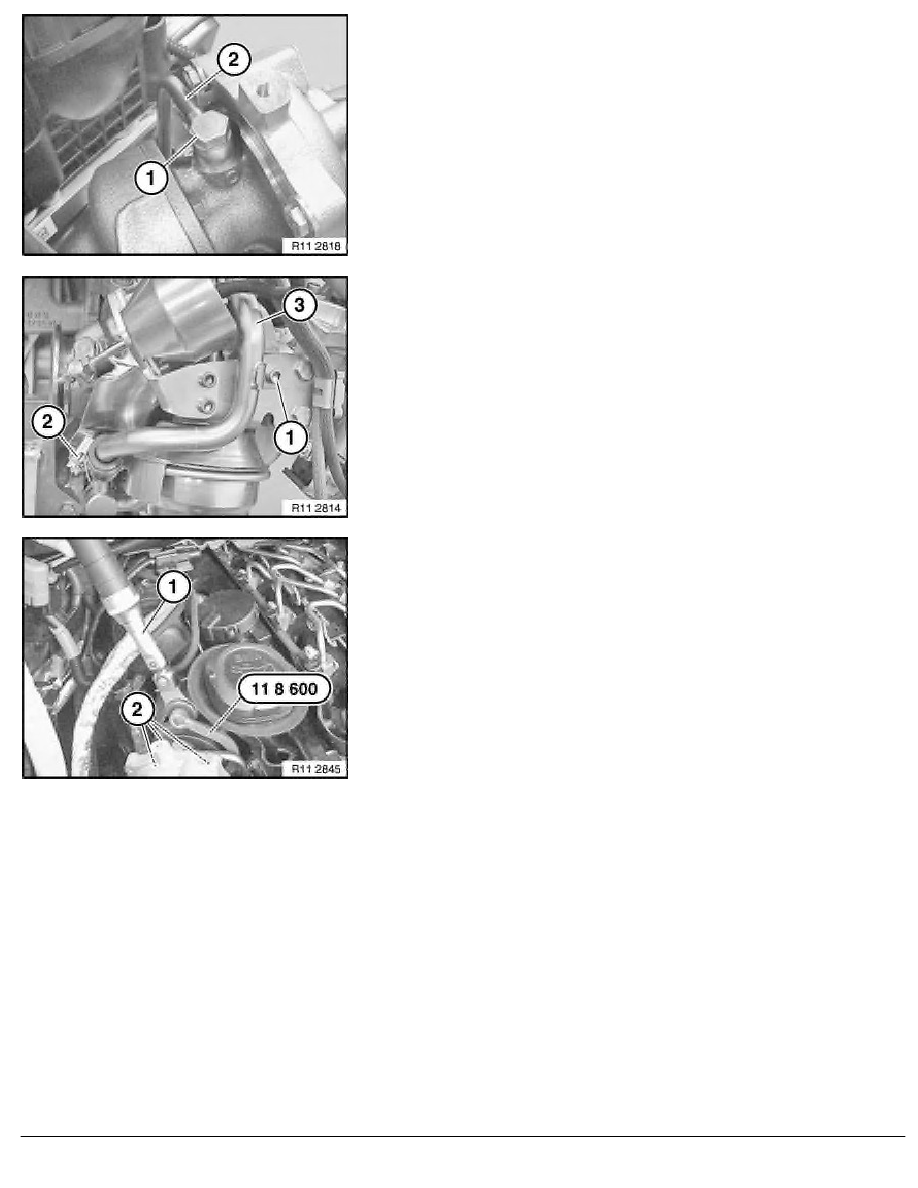
Release banjo bolt (1).
Tightening torque 11 42 2AZ.
Note:
Catch escaping engine oil in a suitable container.
Installation:
Align oil line (2) centrally.
Clean sealing surfaces and replace seal.
Check oil level and top up if necessary.
Release screw (1) and hose clamp (2) from oil return line (3).
Important!
The turbine wheel blades must not be damaged when the
turbocharger is removed!
Release bolts (2) on turbocharger (1) with special
tool 11 8 600 in conjunction with a torque wrench (1).
Installation:
•
When special tool 11 8 600 is used, 7 Nm on torque
wrench scale (1) corresponds to an actual tightening torque
of 8 Nm
Tightening torque 11 65 4AZ.
•
Convert oil lines where necessary to new turbocharger.
•
Replace all seals
•
Clean sealing faces on exhaust manifold
•
Replace gasket for turbocharger
RA Removing and installing/replacing high-pressure exhaust turbocharger (small turb
BMW AG - TIS
26.01.2013 01:51
Issue status (12/2007) Valid only until next DVD is issued
Copyright
Page - 5 -