
3 Series E46 316i (M43TU) SAL
Unfasten screws.
Tightening torque: 26 11 1AZ
.
Installation:
-
Replace self-locking nuts
-
Grip heads of mounting screws of flexible disk on
transmission flange and tighten down at nuts.
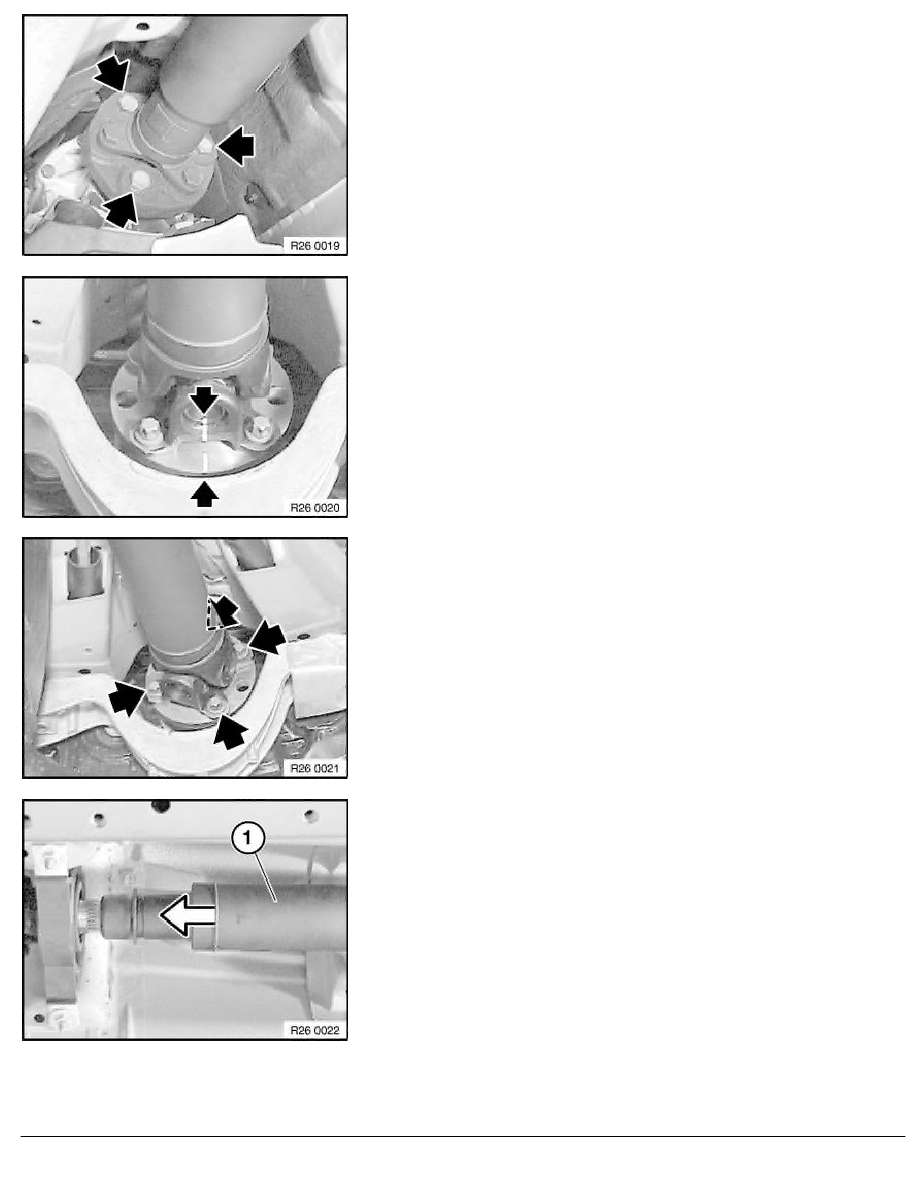
Important!
To avoid complaints of humming:
Before removing propeller shaft, mark cardan universal joint to
drive flange of final drive.
Reinstall joint in this position.
Unfasten screws.
Tightening torque: 26 11 4AZ
.
Push rear propeller shaft (1) forwards.
RA Removing and installing propeller shaft (cardan universal joint) completely
BMW AG - TIS
19.01.2013 12:17
Issue status (12/2007) Valid only until next DVD is issued
Copyright
Page - 2 -