
3 Series E46 316i (M43TU) SAL
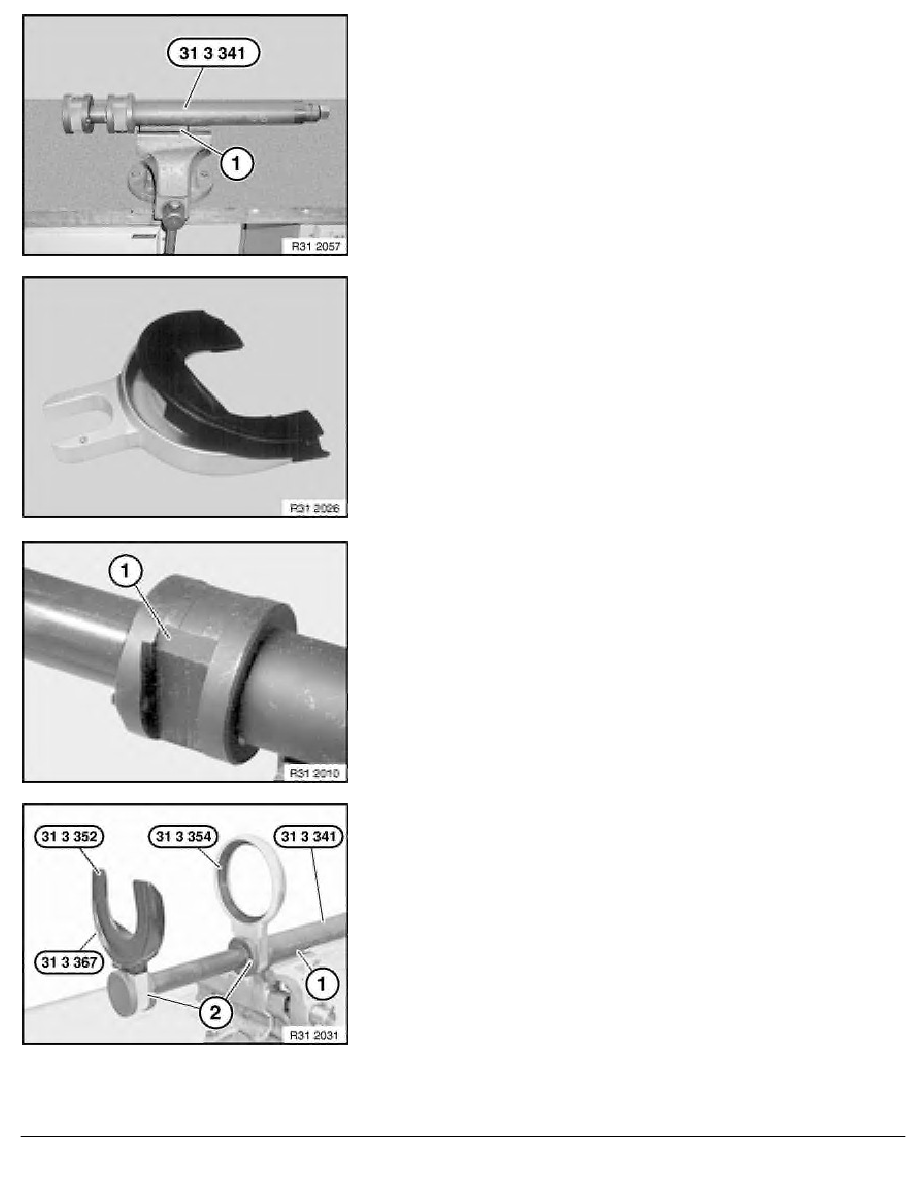
Clamp basic tool 31 3 341 at strip (1) in vice.
The protective inserts protect the sensitive springs against
damage. Therefore always use the spring holders with the
appropriate protective inserts.
On some vehicle model series (e.g. E60), there is the risk of the
spring turning during removal/installation together with the
protective insert out of the spring holder. This poses a danger to
life!
In this case, the protective insert must not be fitted with the spring
holders.
Reference is clearly made to this in the corresponding repair
instruction.
Spring holders must each be inserted from chamfer (1) into the
basic tool.
Depending on the model, feed the corresponding spring
holders (here 31 3 352 and 31 3 354) and if necessary
together with the protective inserts (here 31 3 367 and
31 3 354) into the fixtures (2) of basic tool 31 3 341 (1) and
lock in place.
The correct spring holders for the corresponding models are
specified in the repair instruction.
Locking pins of fixture (2) must be felt and heard to snap into
place.
RA Instructions on handling the BMW spring tensioner
BMW AG - TIS
19.01.2013 12:28
Issue status (12/2007) Valid only until next DVD is issued
Copyright
Page - 3 -