
3 Series E46 320d (M47TU) SAL
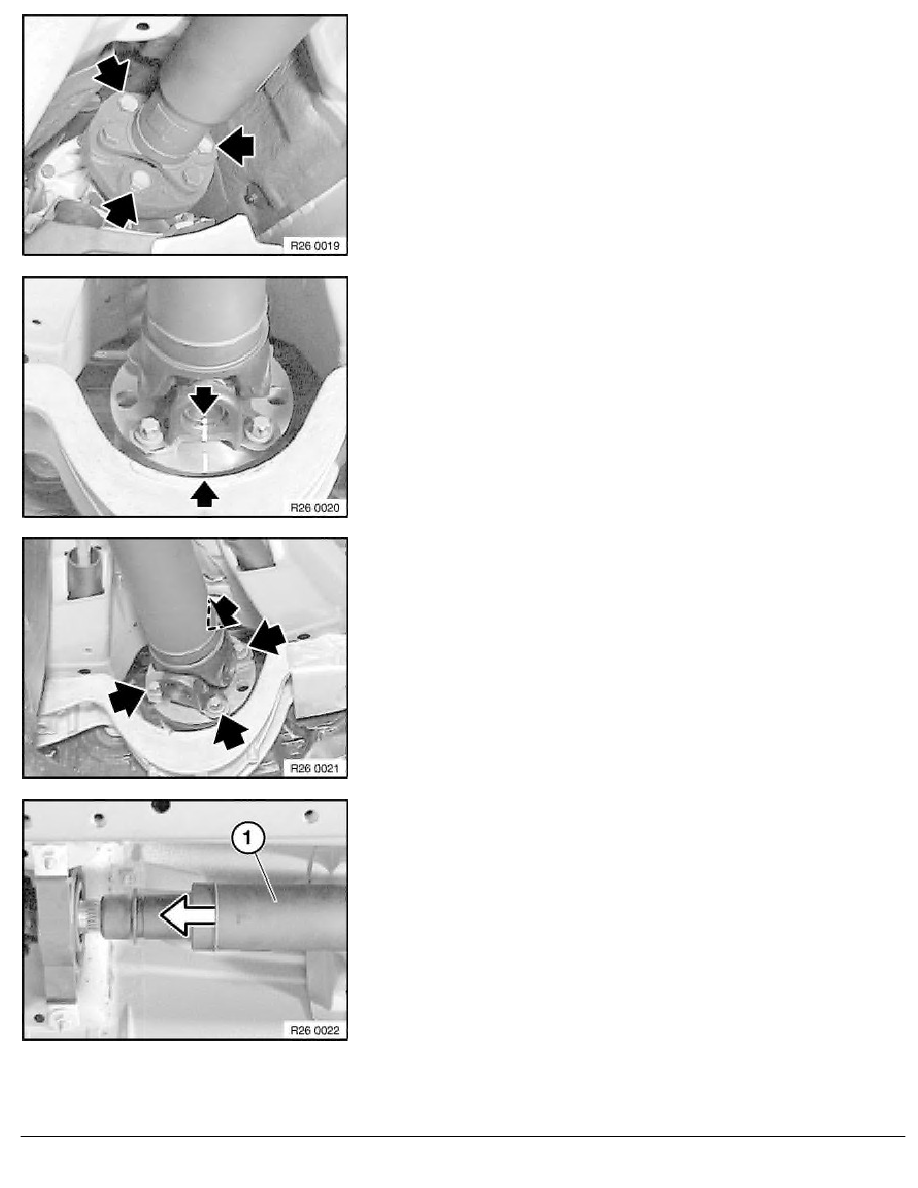
Release screws.
Tightening torque, 26 11 1AZ.
Installation:
Replace self-locking nuts.
The screw connection may only be tightened by means of the
nut.
Caution!
To avoid complaints of humming: before removing propeller
shaft, mark universal joint to drive flange of final drive.
Release screws.
Tightening torque, 26 11 4AZ.
Push rear propeller shaft (1) forwards.
RA Removing and installing complete propeller shaft (three-part propeller shaft)
BMW AG - TIS
12.02.2013 16:10
Issue status (12/2007) Valid only until next DVD is issued
Copyright
Page - 2 -