
3 Series E46 330xi (M54) SAL
Installation:
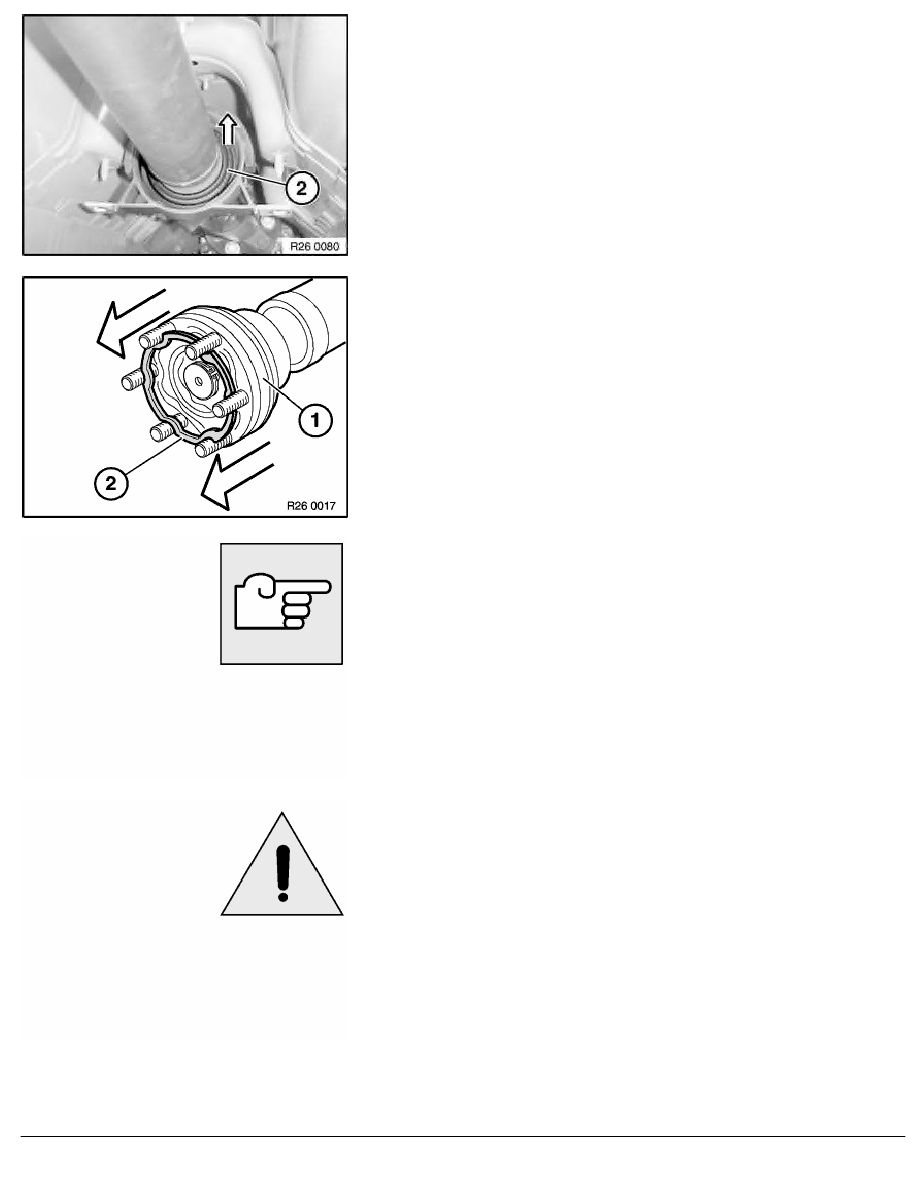
Press center bearing (2) into transmission tunnel.
Installation:
Top up grease fill.
Grease,
refer to BMW Parts Service.
Withdraw constant-velocity joint (1) up to stop.
Degrease sealing surfaces on constant velocity joint and drive
flange.
Replace gasket (2).
Installation:
Use new nuts.
Attach propeller shaft with pulled-apart constant-velocity joint to
drive flange of final drive.
Important!
The constant-velocity joint must not be compressed during
assembly because the grease fill can force away the sealing
ring, leading to leakage from the constant-velocity joint.
By alternately tightening 2 opposing nuts, draw constant-
velocity joint uniformly into drive flange.
Then tighten down the remaining nuts.
Tightening torque 26 11 4AZ
.
RA Removing and installing propeller shaft - version with rear constant-velocity jo
BMW AG - TIS
16.02.2013 10:17
Issue status (12/2007) Valid only until next DVD is issued
Copyright
Page - 3 -