5 Series E34 525td (M51) TOUR

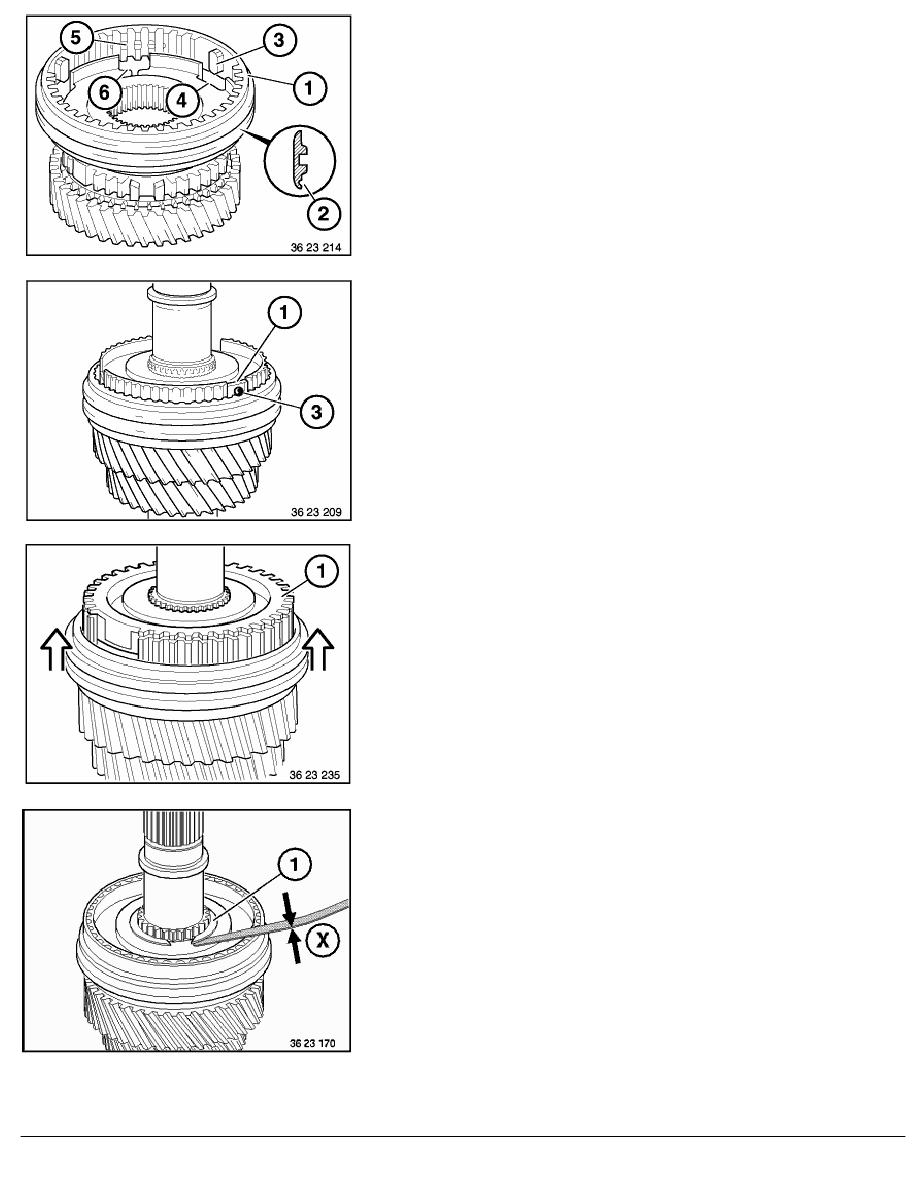
Single taper synchronization:
Attach sliding sleeve (1) with the orientation groove (2) to the
2nd gear wheel. Lug (3) on the sliding sleeve point towards
the middle of the opening (4), or, as the case may be, the
teeth with the grooves (5) towards the opening (6) of the
sliding blocks.
Tilt thrust pieces (1) out of the operating sleeve separately far
enough that balls (3) can be placed on the springs.
Push in balls (3) and simultaneously press the thrust pieces into
the operating sleeve.
Insert 1st gear synchronizer ring (1) into the guide sleeve
openings.
Pull the operating sleeve upwards uniformly as far as the lock
(neutral position).
Install appropriate circlip (1). Circlips are available in Parts Service
from 2.0 ... 2.3 mm in increments of 0.05 mm.
Max. permissible end float X: 0.04 mm.
RA Detaching and mounting all synchronizing devices S5D 200G/250G
BMW AG - TIS
23.01.2013 07:13
Issue status (12/2007) Valid only until next DVD is issued
Copyright
Page - 7 -
