
5 Series E34 525td (M51) TOUR
Starting removal:
-
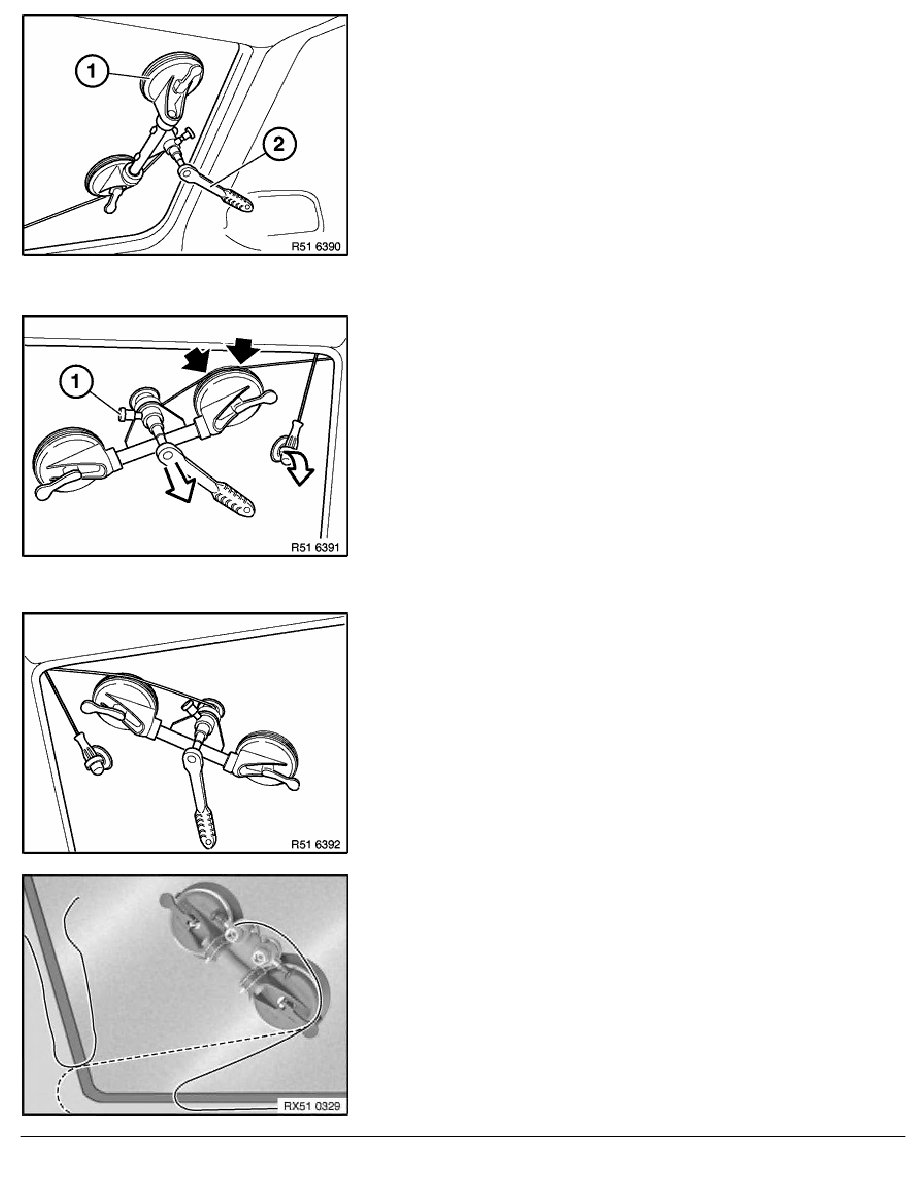
Place windlass (1) on windscreen
-
Feed wire end into coil of windlass (1)
Note:
Coil can only be turned in one direction.
-
Make sure the wire is always situated in the guide channel of
the windlass (1)
-
Fit reversible ratchet (2) on coil and tension wire
-
Start by cutting lower adhesive bead
-
Grip second wire end in special tool 51 3 270
Moving windlass:
-
Before moving windlass, remove reversible ratchet, extension
and parabolic tool
-
Release sucker on windlass
-
Pull and hold black locking button (1)
-
Turn windlass and move with sucker
-
Refit reversible ratchet, parabolic tool and if necessary
extension
-
When cutting the corner points, make sure the wire is
situated in the guide channel of the windlass; this makes the
cutting job easier
Installing second windlass:
-
Secure second windlass by suction on windscreen
-
Feed second wire end into coil
-
Cut left side and top left corner point, as described above
-
Finish removal
-
Remove "Roll Out 2000"
Windlass with double coil:
For use with small windows.
-
Attach windlass firmly to window so that both coils are turned
away from application point of wire
-
Feed either the upper wire end into the lower coil or the lower
wire end into the upper coil
-
Fit reversible ratchet on coil and tension wire
-
Cut through approx. 10 cm of bonding joint
RA Removing windscreen with "Roll Out 2000"
BMW AG - TIS
23.01.2013 08:01
Issue status (12/2007) Valid only until next DVD is issued
Copyright
Page - 4 -