
5 Series E34 525td (M51) TOUR
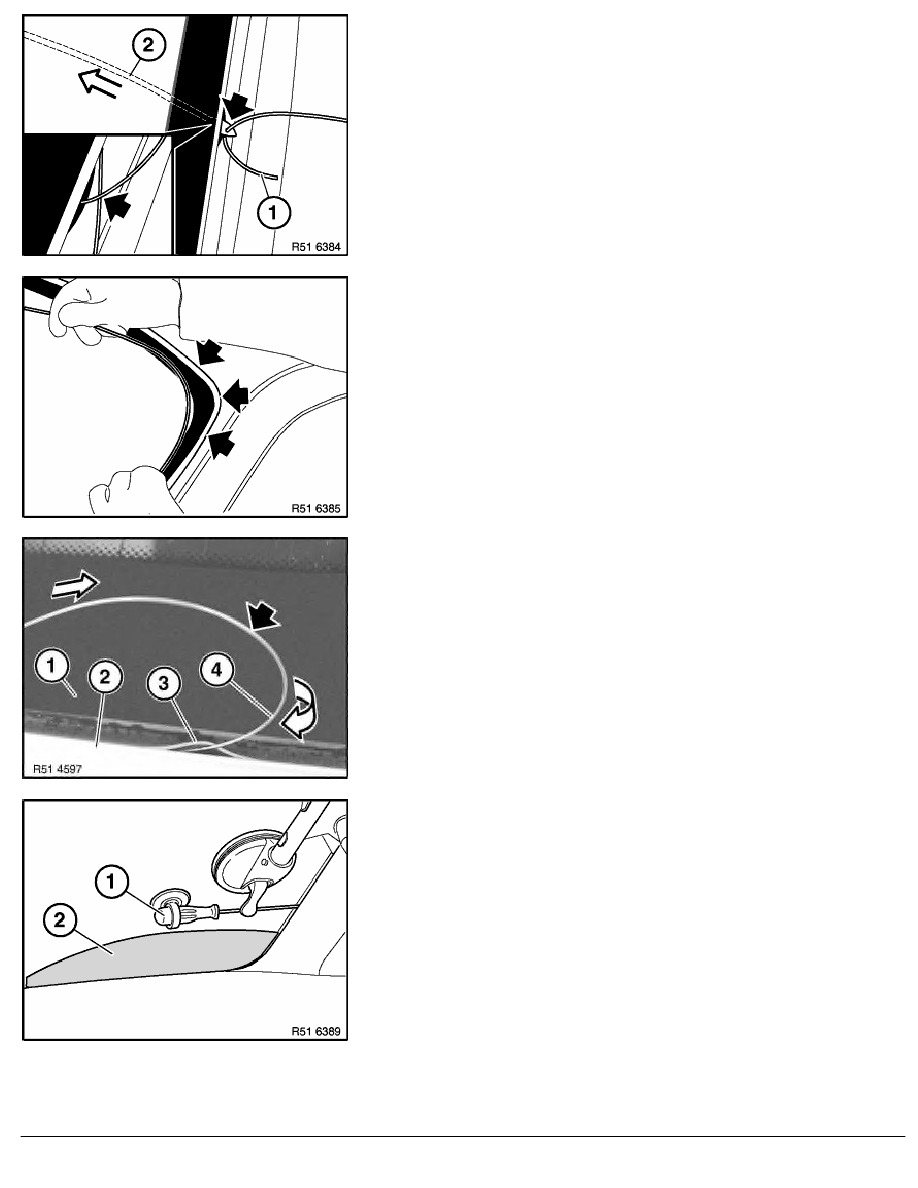
Pulling cutting wire into car:
-
Push wire starter (2) from inside at a suitable point through
adhesive bead
-
Feed wire end (1) into hole of wire starter (2) and bend
back
-
Pull in both wires in succession crossways
Note:
Crossing the wires cuts through the adhesive bead completely.
Laying cutting wire around windscreen:
-
Starting from pull-in point, lay wire eyelet created on the
outside counterclockwise around the windscreen
-
Pull excess wire into car interior
Important!
Make sure the cutting wire is located at all four corner points
below the windscreen.
Check that the cutting wire is not caught on retainers or body.
Secure window on outside with adhesive tape against slipping
Note:
Windows (1) with fitted seals (3) or sprayed-on surrounds:
-
Moisten cutting wire (4) and seals (3) on window (1) with
water
-
Insert cutting wire (4) in bend (without kinking) between
window (1) and body cutout (2)
Protecting car interior:
-
To avoid damage and if necessary dirt, protect A-pillars, roof
and instrument panel by means of parabolic tool (1) or
plastic washer (2)
-
Move parabolic tool (1) during removal so that wire cannot
get caught
-
Always guide plastic washer (2) between wire and panel
RA Removing windscreen with "Roll Out 2000"
BMW AG - TIS
23.01.2013 08:01
Issue status (12/2007) Valid only until next DVD is issued
Copyright
Page - 3 -