
5 Series E39 540i (M62) SAL
There must be enough space for the glue bead in the middle between the expanding foam tape (4) and spacer
section (5).
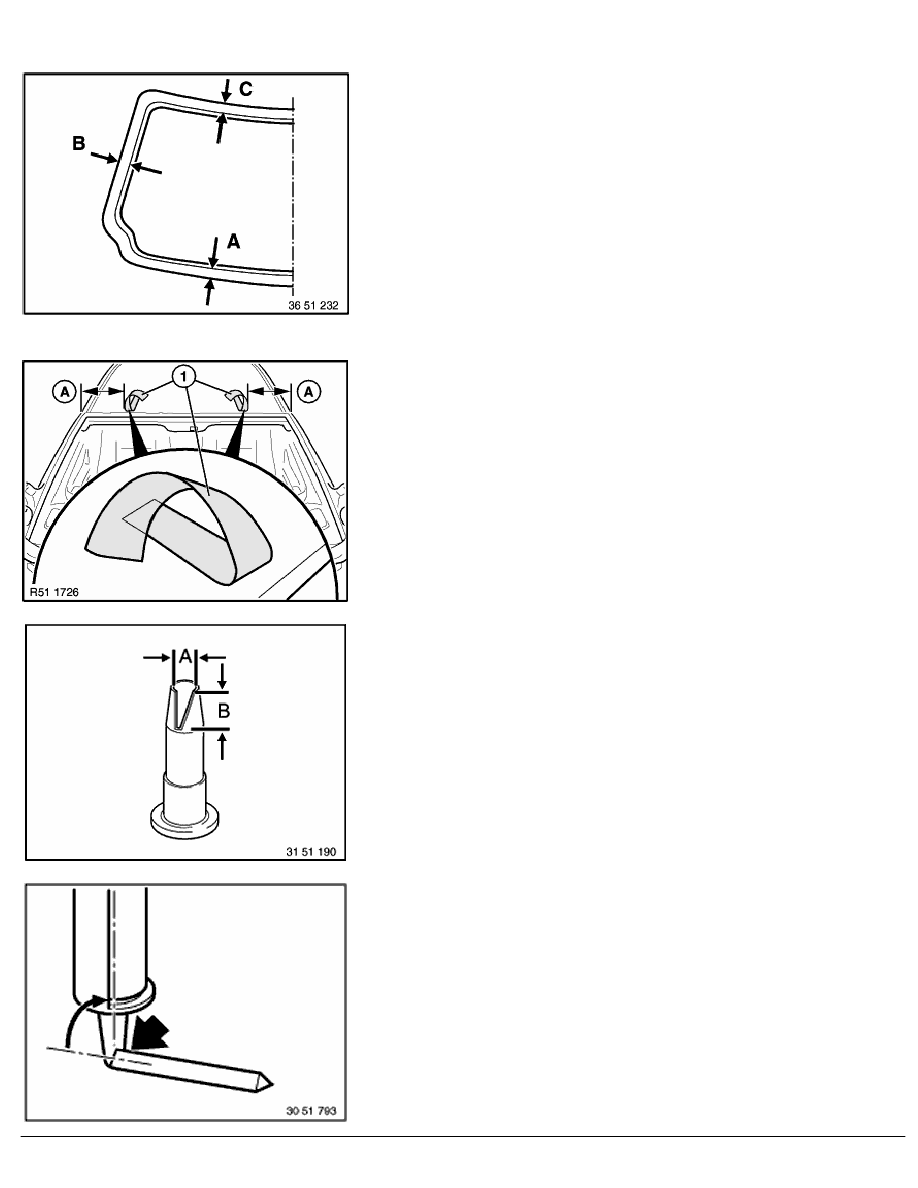
Treat windshield up to distance (A, B, C) from edge of windshield
with BMW-approved materials (repair kit, sourcing reference:
BMW Parts Service),
refer to 51 31 ...
(A) 27 mm
(B) 25 mm
(C) 25 mm
Note:
Note ventilation time!
Fit gasket to windshield and press firmly into place.
Note:
Adhesive area for plastic adhesive tapes (1) must be free of
grease and dust.
Press down two yellow adhesive tapes (1) (sourcing reference:
BMW Parts Service) onto roof at a distance (A) from outer
corners.
Length
approx. 400 mm
Width
50 mm
(A) approx. 250 mm
Cut nozzle to size.
(A) 7
+1
mm
(B) 11
-2
mm
Note:
To apply a uniform glue bead, use cartridge pistol, operated
with compressed air or electric power (sourcing reference:
BMW Parts Service).
Check expiry date of glue!
If necessary, apply a test bead before gluing.
Cartridge must be held perpendicularly to the windscreen glass.
RA Removing and installing windshield (Protection)
BMW AG - TIS
20.02.2013 20:09
Issue status (12/2007) Valid only until next DVD is issued
Copyright
Page - 10 -