
5 Series E39 540i (M62) SAL
Caution!
No glue must be applied to contacts of windshield heating.
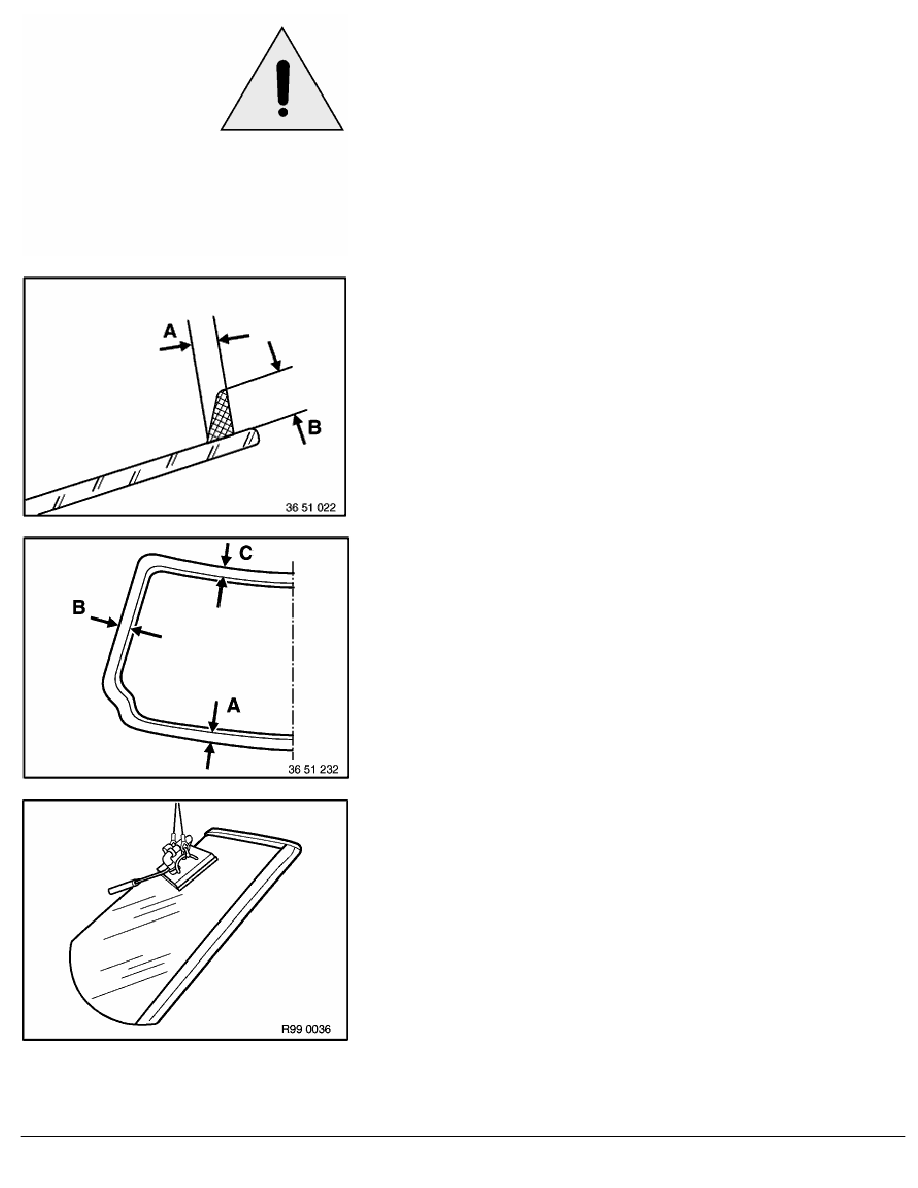
Shape of glue bead:
(A) 7
+1
mm
(B) 11
-2
mm
Caution!
Apply adhesive bead swiftly. Skin forms on adhesive after
max. 10 minutes. Do not touch adhesive bead.
Apply glue bead at distance (A, B, C) along edge of windshield.
(A) 10 mm
(B) 8 mm
(C) 8 mm
Place windshield on a suitable surface with inside facing
downwards.
Suspend special tool 51 9 002 (suction lifter) from conventional
workshop lifting equipment.
Switch on vacuum pump.
Firmly attach special tool 51 9 002 to outside of windshield in
center in upper third.
RA Removing and installing windshield (Protection)
BMW AG - TIS
20.02.2013 20:09
Issue status (12/2007) Valid only until next DVD is issued
Copyright
Page - 11 -