
6 Series M6 (S85) Coupe
Release hexagon socket screws with washers (1 and 2) through
90
°
.
Installation:
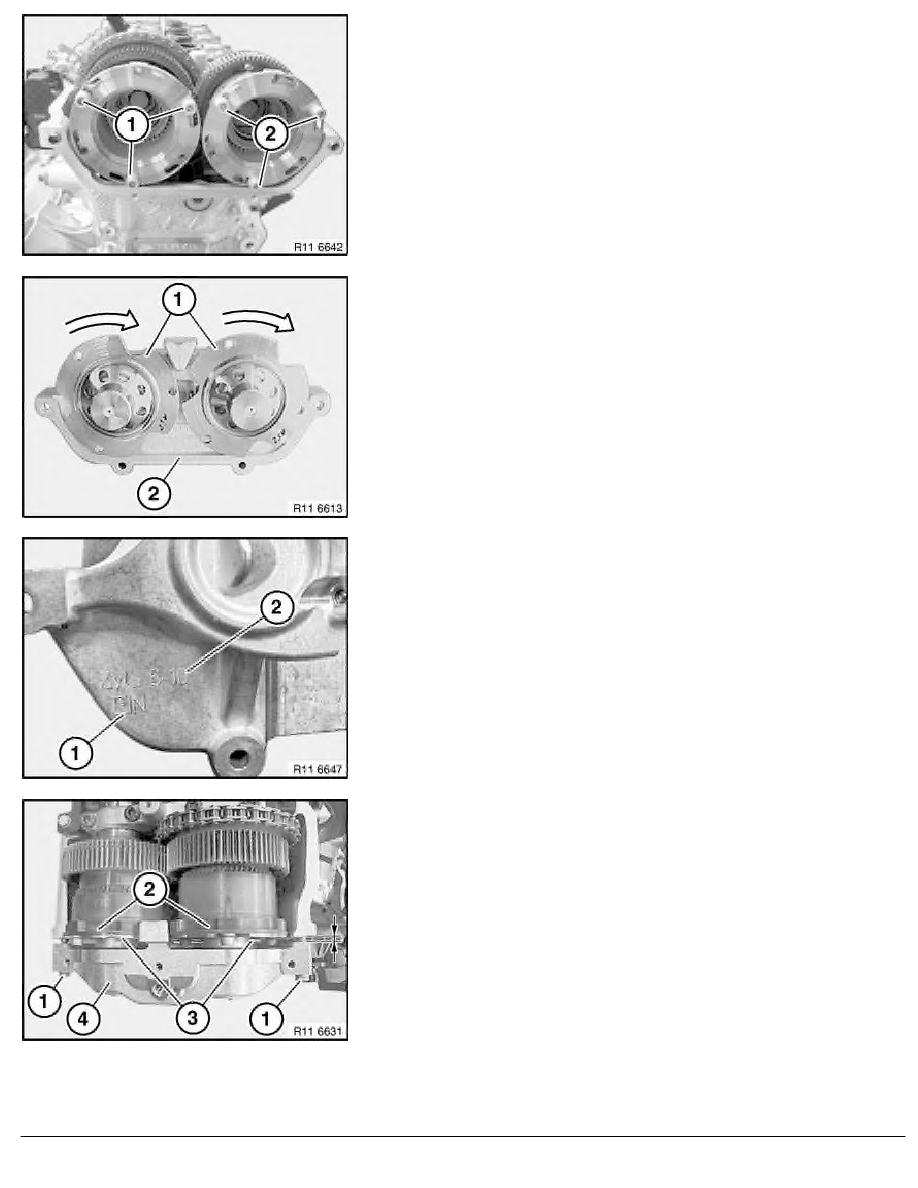
Both thrust bearing plates (1) on the VANOS adjustment unit can
be rotated.
Both thrust bearing plates (1) must be retracted.
Clean sealing surface (2).
Replace seal.
Important!
Risk of mixing up
Installation:
VANOS adjustment units are marked to avoid being mixed up.
The lettering EIN (1) must point to the inlet camshaft.
Cylinder assignment (2), cyl. 1-5 or 6-10.
Insert seal.
Position VANOS adjustment unit (4) with both outer bolts (1).
Both VANOS gears (2) are extended.
Align thrust bearing plates (3).
Push VANOS adjustment unit (4) forwards until thrust bearing
plates (3) rest against VANOS gears (2).
Installation:
There is a visible gap of approx. 8 mm between VANOS
adjustment unit and cylinder head.
Note:
Illustration shows cyl. 1 to 5.
RA Removing and installing / replacing left exhaust VANOS gear (S85)
BMW AG - TIS
19.01.2013 13:25
Issue status (12/2007) Valid only until next DVD is issued
Copyright
Page - 5 -