
6 Series M6 (S85) Coupe
Insert hexagon socket screws (1) without washers and join to
5 Nm.
Release hexagon socket screws (1) without washers through 90
°
again.
Important!
All hexagon socket screws with and without washers must be
released through 90
°
.
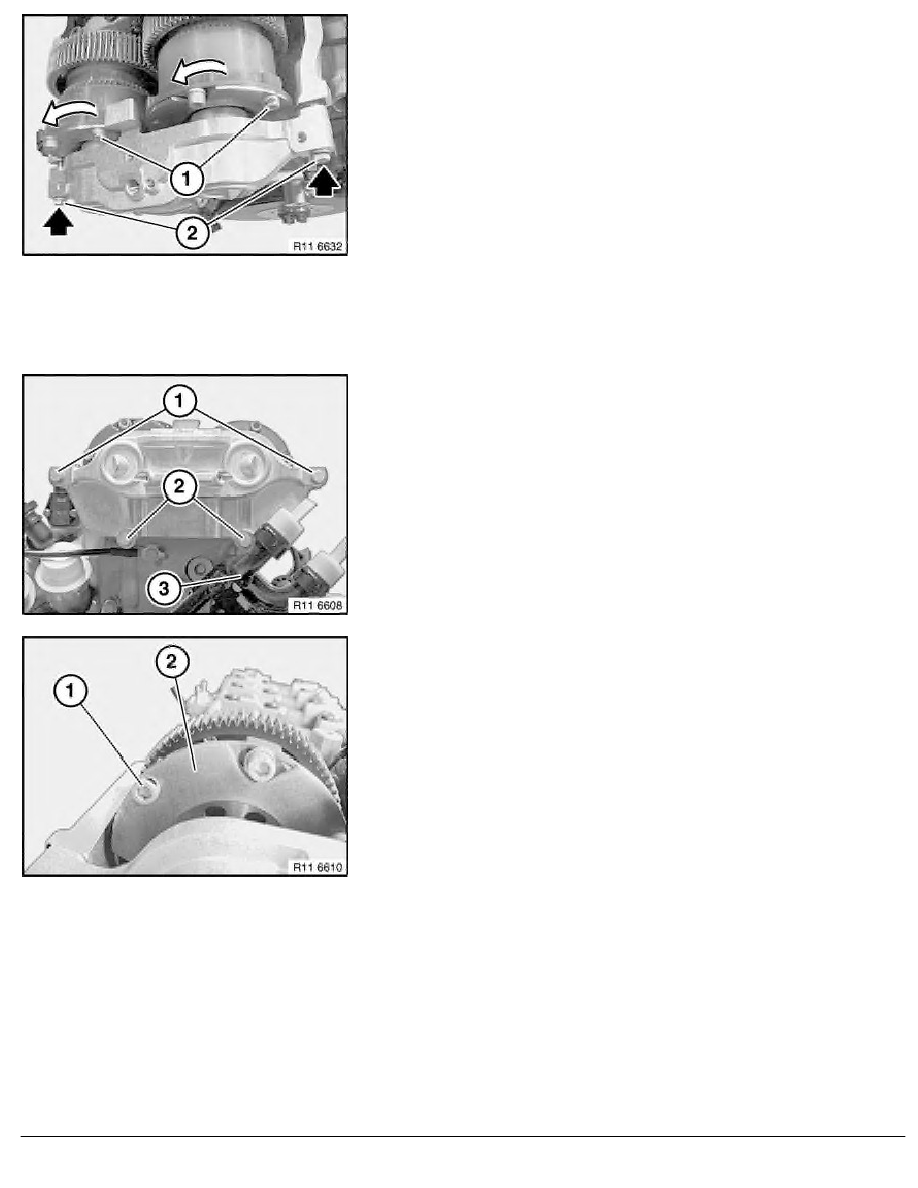
Screw in bolts (2) of VANOS adjustment unit uniformly in 1/2
turns.
Installation:
Both outer sleeves rotate clockwise and retract approx. 8 mm.
Both inner sleeves with elongated hole must rotate
counterclockwise (see arrow).
Installation:
Check seal for correct seating.
Secure VANOS adjustment unit with screws (1 and 2).
Tighten down hexagon socket screws with and without washers
to 10 Nm .
Installation:
Mark all screws which are already tightened down with a coloured
dot.
Note:
Illustration shows cyl. 1-5.
RA Removing and installing / replacing left exhaust VANOS gear (S85)
BMW AG - TIS
19.01.2013 13:25
Issue status (12/2007) Valid only until next DVD is issued
Copyright
Page - 6 -