
7 Series E38 740d (M67) SAL
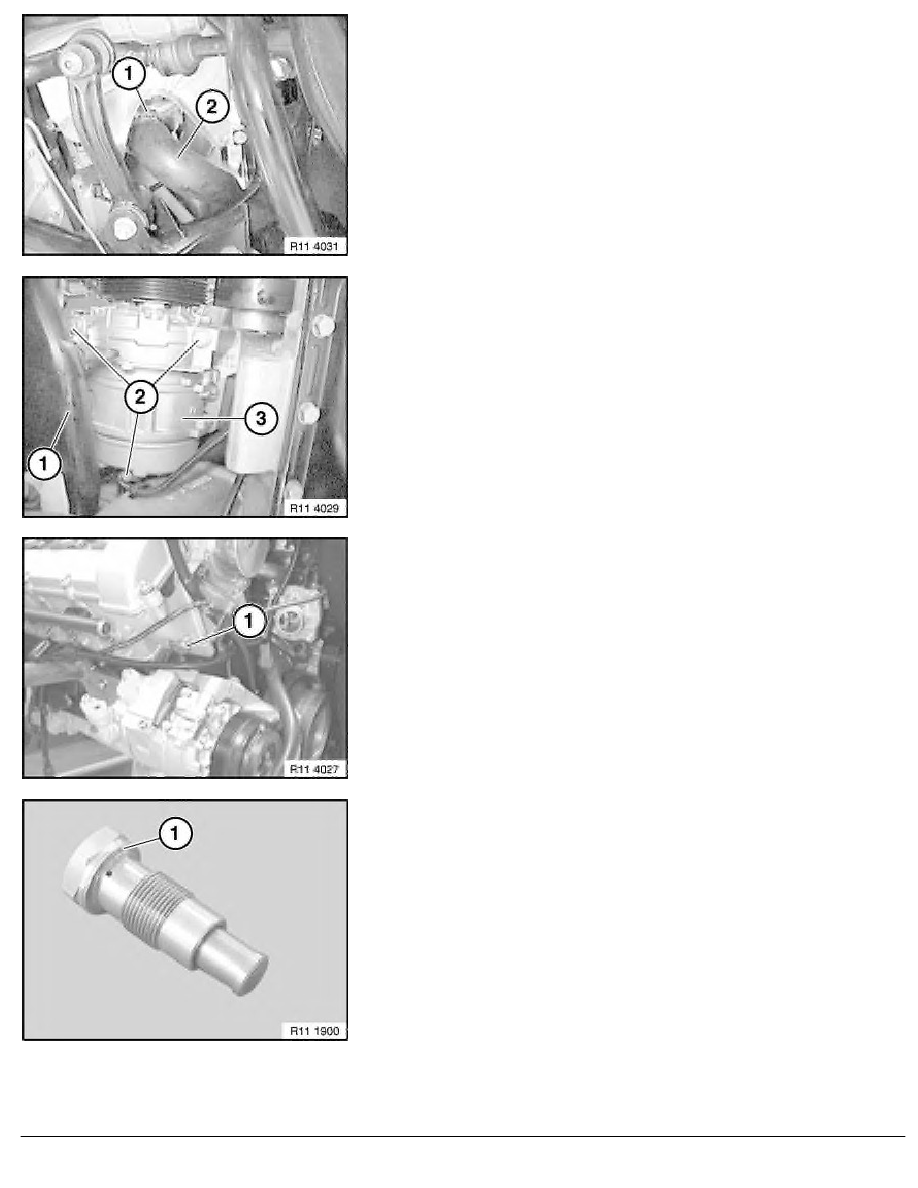
Release clamp (1).
Tightening torque,
refer to Technical Data 11 65 10AZ.
Remove charge air hose (2) together with charge air pipe.
Installation:
Fit charge air hoses dry and without grease.
Detach intake manifold (1) from turbocharger and lay to one side.
Note:
Compressor (3) of A/C system remains connected.
Release screws (2).
Place compressor (3) of A/C system downwards.
Release chain tensioner (1).
Tightening torque,
refer to Technical Data 11 31 8AZ.
Note:
For a better overview, this work step is shown on an engine that
has been removed.
Installation:
Replace sealing ring (1).
RA Removing and installing/replacing hydraulic chain tensioner for cylinders 1 - 4
BMW AG - TIS
10.02.2013 02:47
Issue status (12/2007) Valid only until next DVD is issued
Copyright
Page - 3 -