
7 Series E38 740iL (M60-2) SAL
Caution!
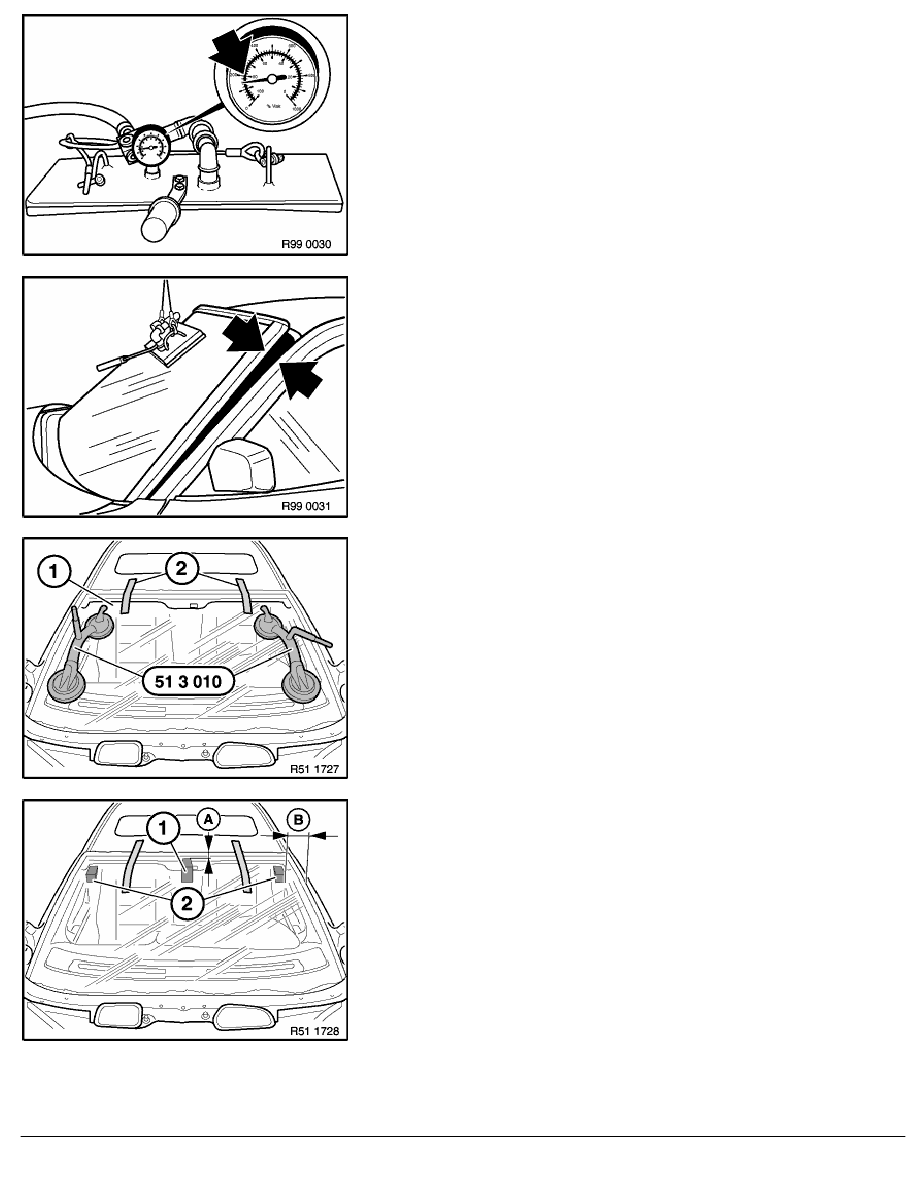
Follow operating instructions for special tool 51 9 002.
The pointer of the vacuum gauge must be in the green area.
Do not shorten connecting hose between suction hoist and
vacuum pump (minimum length 5 m).
Replacement with original hose only.
Lift windshield with special tool 51 9 002 over body cutout.
First position windshield carefully at top and align sides evenly.
Lower windshield at bottom and in so doing press upwards on left
and right with two special tools 51 3 010 until seal contacts roof
uniformly.
Secure windshield (1) in this position on top with yellow plastic
adhesive tapes (2) (sourcing reference: BMW Parts Service) and
press down all around.
Switch off vacuum pump.
Remove special tools 51 3 010 and 51 9 002.
To avoid wind noises: The windshield is pretensioned at the top.
Pretension is created with special tool 51 3 130 (three HR foam
blocks).
1 piece (1): 40 x 70 x 70 mm (W x H x D)
2 pieces (2): 40 x 30 x 70 mm (W x H x D)
Position of HR foam blocks:
HR foam blocks (1), middle, at distance (A) from top.
HR foam blocks (2), distance (A) from top, distance (B) at side.
(A) and (B)
100 mm
RA Removing and installing windshield (Protection)
BMW AG - TIS
14.02.2013 14:43
Issue status (12/2007) Valid only until next DVD is issued
Copyright
Page - 15 -