
7 Series E38 740iL (M60-2) SAL
Open both front doors.
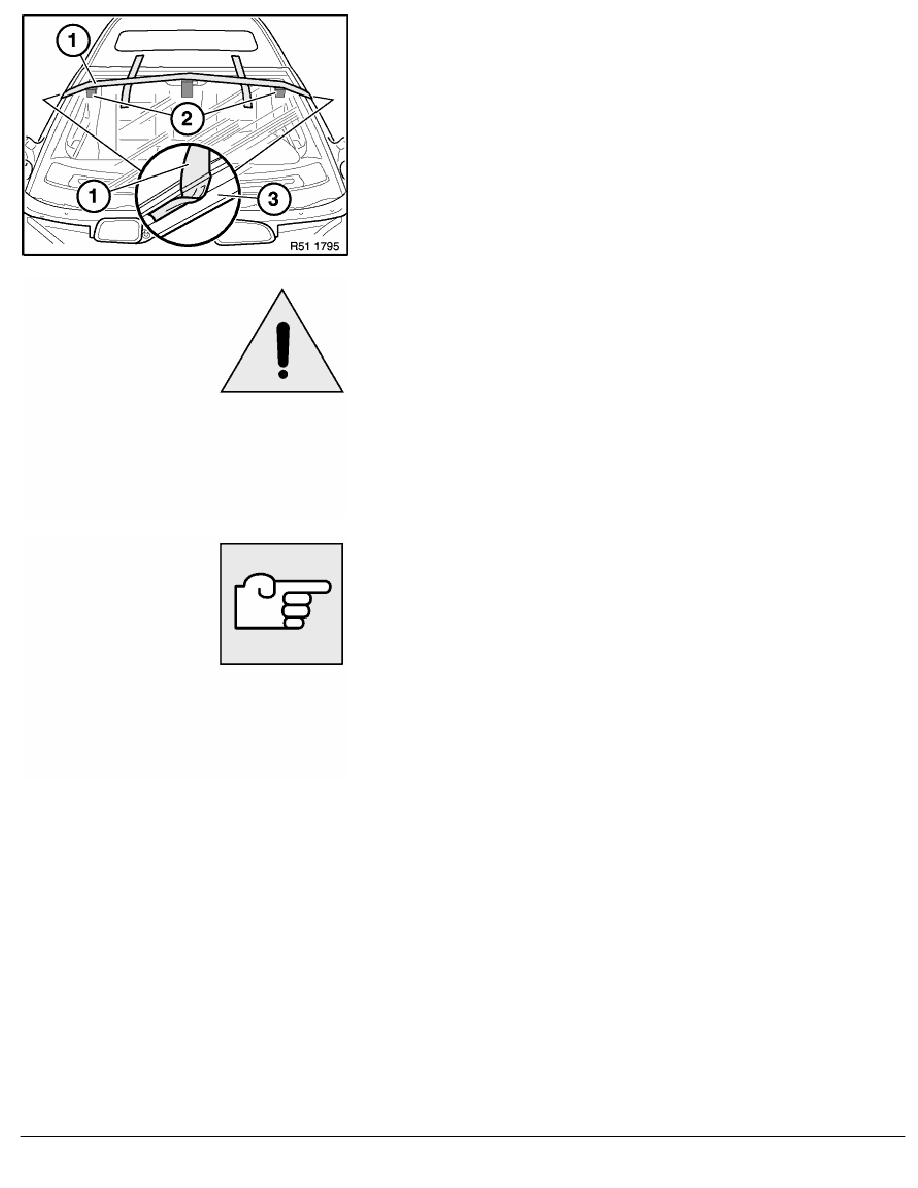
Secure HR foam blocks (2) with yellow plastic adhesive tape (1)
(Tesa).
Pretension windshield with yellow plastic adhesive tape (1) until it
is correctly positioned at top.
Note:
Do not stick yellow plastic adhesive tape (1) above A-pillar
finisher (3) or ITS head airbag.
Caution!
Hardened glue can only be removed by machine.
Remove contamination caused by residual adhesive
immediately with Sika remover 208 (sourcing reference: BMW
Parts Service). Do not press out windscreen glass again for
this purpose.
Assemble car.
After hardening time, remove support.
Note:
Leaks are detected by spraying water under the sealing lips or
by using an ultrasonic leak tester and can then be sealed with
an appropriate nozzle.
RA Removing and installing windshield (Protection)
BMW AG - TIS
14.02.2013 14:43
Issue status (12/2007) Valid only until next DVD is issued
Copyright
Page - 16 -