
7 Series E65 745d (M67TU) SAL
Note:
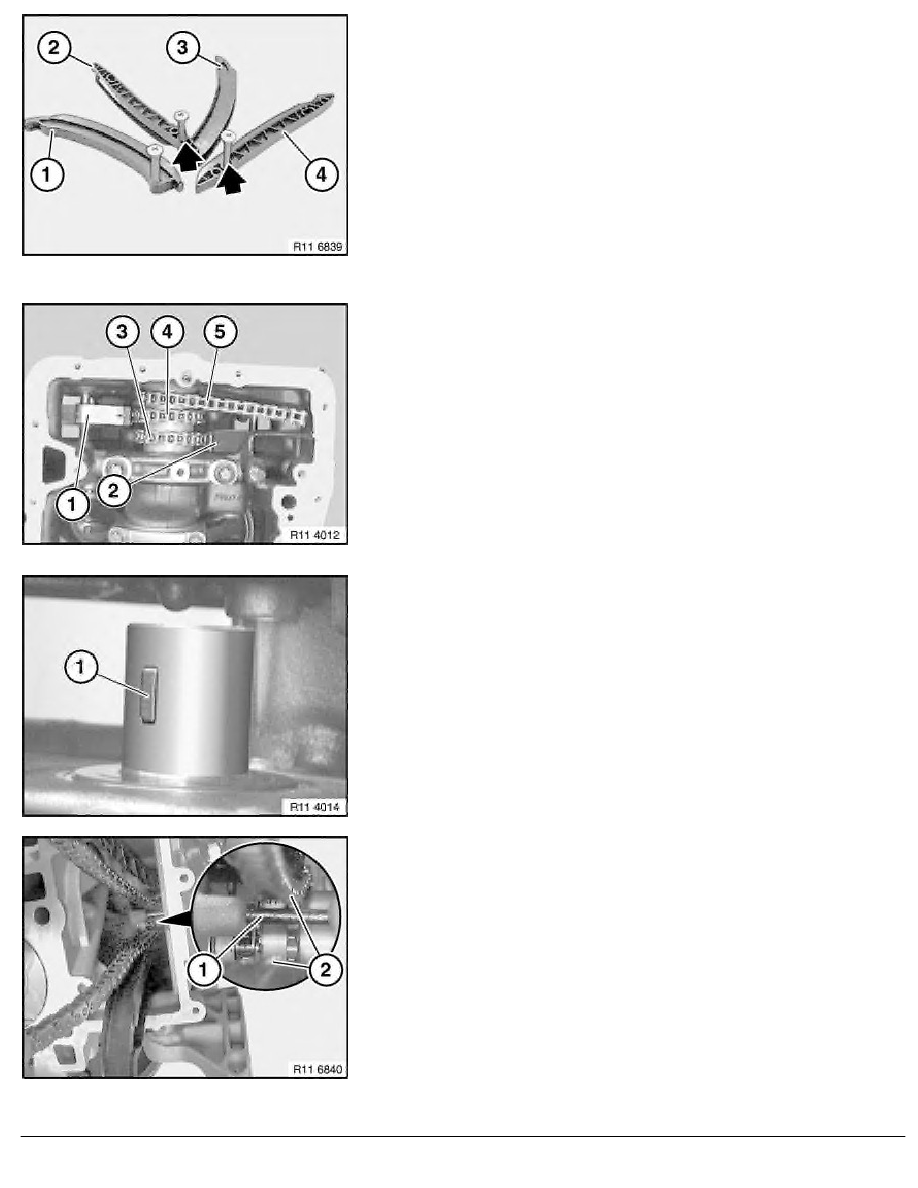
Shown without crankcase for purposes of clarity.
Clamping rail (1) with guide pin, cyl. 1 to 4.
Guide rail (2) and clamping rail (3) with guide pin.
Guide rail (4) with guide pin, cyl. 5 to 8.
Installation:
On guide rail (2), cyl. 1 to 4, the bearing pin must be inserted in
the bottom hole.
On guide rail (4), cyl. 5 to 8, the bearing pin must be inserted in
the top hole.
Note:
For purposes of clarity, the bearing pins are still installed in
this illustration.
Remove tensioning rail (1).
Remove guide rail (2).
Lay timing chain (3) of cylinders 5 - 8,
timing chain (4) of cylinders 1 - 4,
drive chain (5) of oil pump so that crankshaft sprocket wheel can
be pushed out forwards.
Push out crankshaft sprocket wheel forwards.
Installation:
Check spring washer (1) and replace if damaged.
Check spring washer (1) for correct seating.
Installation:
If oil spray nozzles (1) are installed, make sure that timing
chains (2) run along outside of oil spray nozzles (1).
RA Replacing both timing chains (M67)
BMW AG - TIS
12.02.2013 13:30
Issue status (12/2007) Valid only until next DVD is issued
Copyright
Page - 3 -