
X Series E53 X5 4.8is (N62-S) OFFRD
Note:
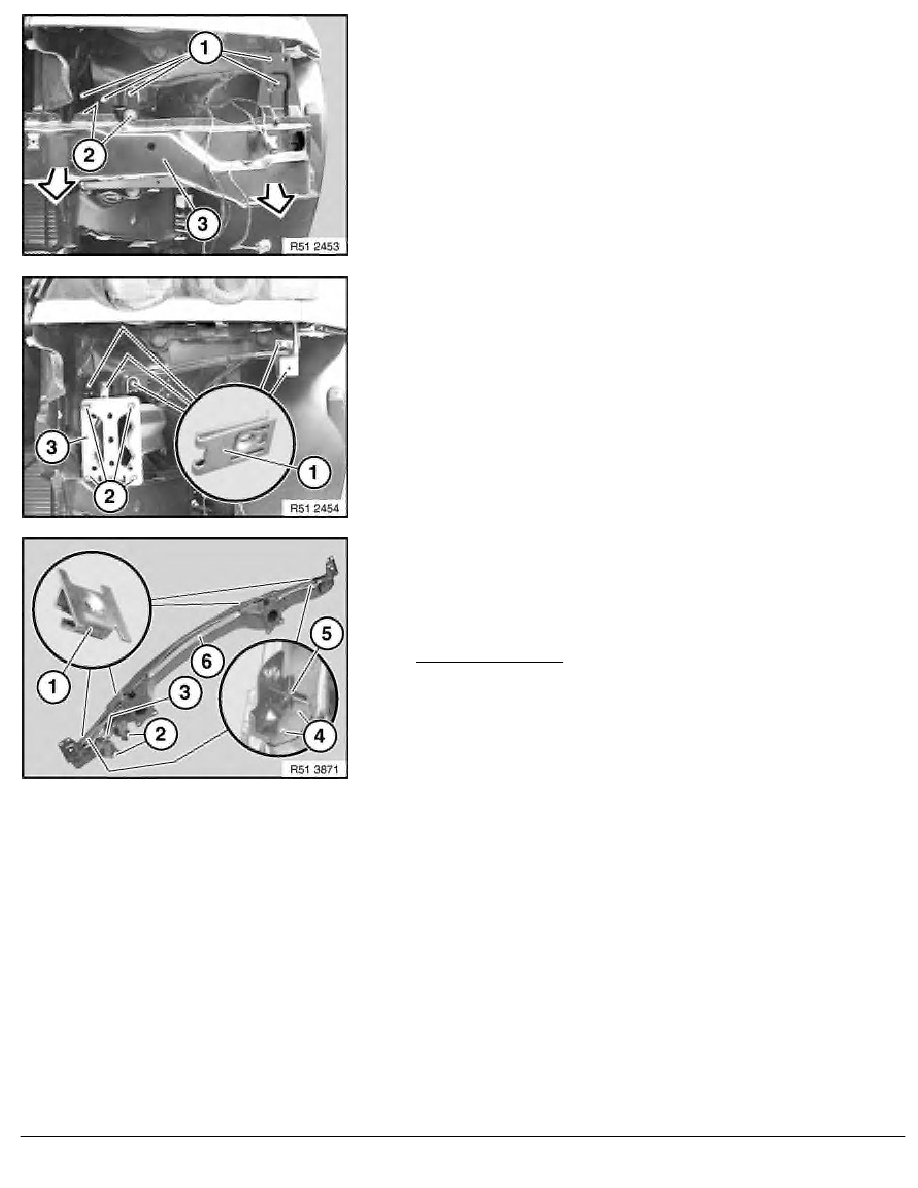
For vertical adjustment, mark position of member (3).
Release screws (1).
Release nuts (2) and remove member (3) towards front.
Installation:
Height adjustment, refer to Gap dimensions, body.
Installation:
If necessary, replace faulty metal nuts (1).
Stud bolts (2) on member (3) must not be damaged.
Installation:
If necessary, replace faulty metal nuts (1) on member (6).
Replacement:
Release nut (3) and remove fanfare horns (2).
Version up to 10/03:
Release welding spots (4), remove holder (5) and protect bright
metal plate against rusting.
RA Removing and installing/replacing member (cross-member) for front bumper trim
BMW AG - TIS
12.02.2013 10:32
Issue status (12/2007) Valid only until next DVD is issued
Copyright
Page - 2 -