
X Series E70 X5 4.8i (N62TU) OFFRD
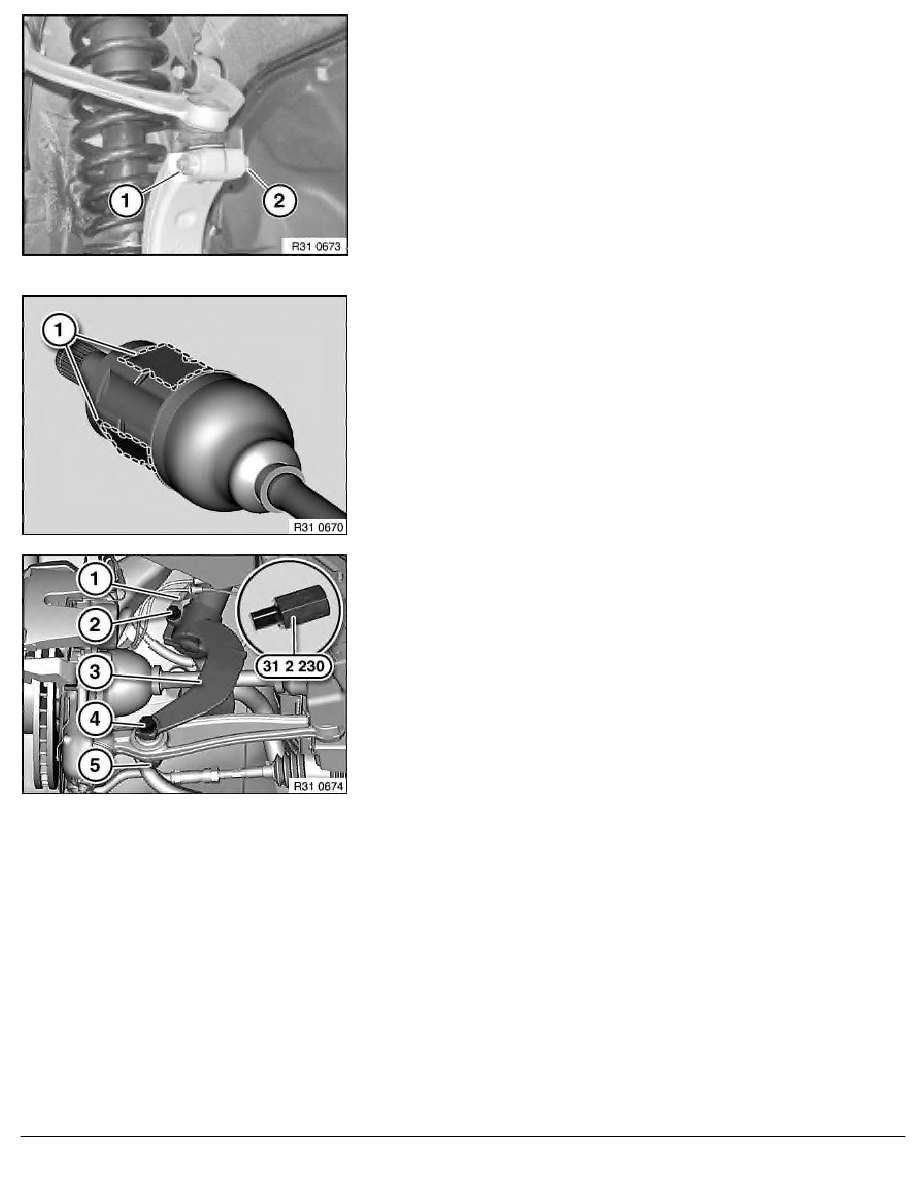
Slacken nut (1).
Release bolt (2) and remove upper control arm from swivel
bearing.
Installation:
Keep upper control arm to swivel bearing connection clean and
free from oil and grease.
Note insertion direction of screw.
Screw must rest correctly in groove of ball stud.
Replace self-locking nut.
Tightening torque 31 12 6AZ
.
Important!
To be able to lower the swivel bearing far enough, it is
necessary to align the output shaft so that one of the marked
surfaces (1) points upwards.
Release bolt (2) and remove with holder (1).
Expand spring strut holder (3) with special tool
31 2 230 .
Release nut (5) and remove screw (4).
Lower swivel bearing until spring strut holder (3) is below spring
strut.
Remove spring strut holder (3), taking care not to damage the
output shaft.
Installation:
Keep spring strut holder to spring strut connection clean and free
from oil and grease.
Version with Vertical Dynamics Management: Align spring strut
holder by way of gap to positioning pin on back of spring strut.
Release bolt (4) and nut (5).
Note insertion direction of bolt (4).
Tighten down first bolt (4) and then bolt (2) in normal position.
Tightening torque 31 12 8AZ
(to spring strut).
Tightening torque 31 12 7AZ
(to lower control arm).
RA Removing and installing/replacing complete front left or right spring strut hold
BMW AG - TIS
08.02.2013 02:43
Issue status (12/2007) Valid only until next DVD is issued
Copyright
Page - 2 -