
X Series E70 X5 4.8i (N62TU) OFFRD
The arrow on the tyre must point in the direction of travel for
each wheel!
Tyre removal with a fitting machine:
Important!
Gap between unseating tool and rim flange must not exceed
max. 2 cm.
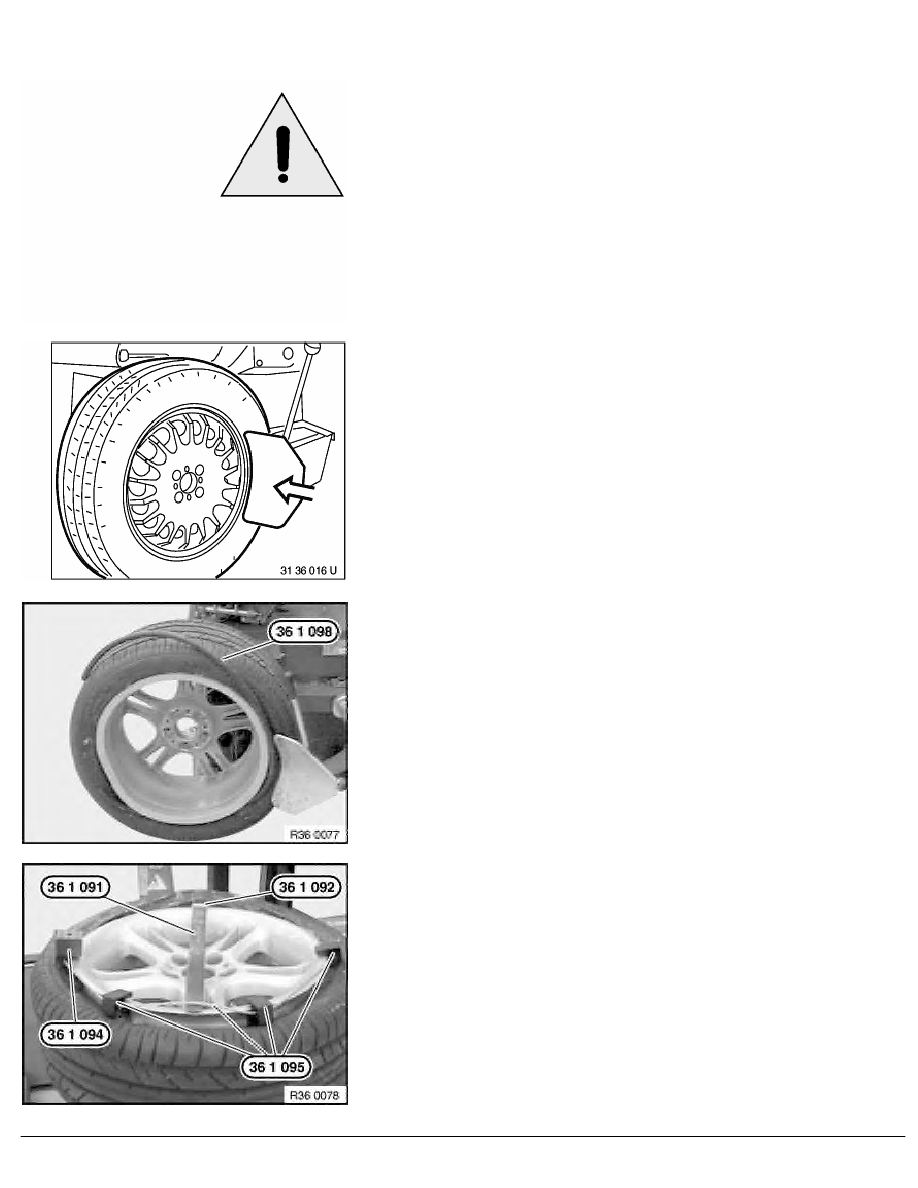
Do not position unseating tool in area of valve (damage to
wheel pressure sensor). Turn wheel through 180
°
and
position unseating tool on opposite side.
Pull off balance weights on rim and clean rim to remove large
pieces of dirt.
Unscrew valve insert, release air.
If tyre beads are stuck, first release the tyre with the pressing-off
horn at several points of the wheel before actually pressing off,
applying tyre mounting paste between the tyre and the rim flange.
Only then press off the tyre completely.
Force off inner side of wheel, inserting special tool 36 1 098
between rim flange and tyre bead in so doing.
Force off outer side of wheel, applying a generous coating of tyre
mounting paste between rim flange and tyre bead in so doing.
Grip wheel with outer side facing upwards on fitting machine.
Position special tool 36 1 094 and special tool 36 1 095 as
shown on rim flange.
Fit special tools 36 1 091 / 36 1 092 between tyre bead and
rim flange, move into position shown and lever tyre bead over rim
flange.
Secure special tools 36 1 091 / 36 1 092 with connecting
cable of special tool 36 1 095 .
RA Replacing a runflat tyre
BMW AG - TIS
08.02.2013 05:40
Issue status (12/2007) Valid only until next DVD is issued
Copyright
Page - 2 -