
X Series E83 X3 3.0d (M57TU) OFFRD
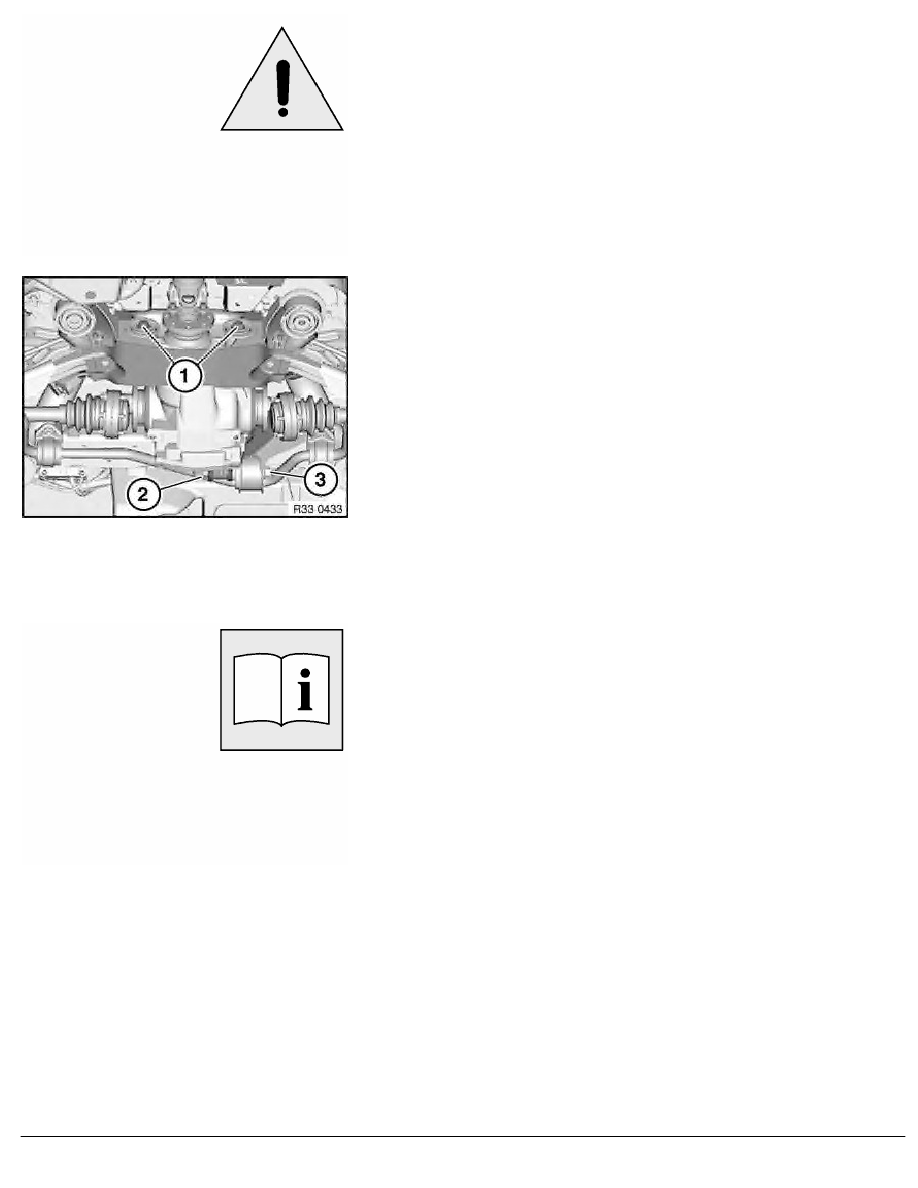
Important!
Adhere to the following installation sequence in order to
prevent distortion of the rear differential during installation and
thereby avoid potential complaints about noise.
Installation sequence:
1.
Install rear differential with workshop jack and special tool
33 4 420 .
2.
Insert bolts (1) (do not tighten down)
3.
Insert bolt (2); if necessary, fit spacer
4.
Replace and screw on nut (3) (do not tighten down)
5.
Lower workshop jack
6.
Install compression strut
7.
Tighten down screws (1)
Tightening torque 33 17 1AZ
.
8.
Tighten nut (3)
Tightening torque 33 17 1AZ
.
After installation:
•
Check rear differential oil level, correct if necessary
RA Removing and installing/replacing rear differential
BMW AG - TIS
15.02.2013 01:58
Issue status (12/2007) Valid only until next DVD is issued
Copyright
Page - 3 -