
Z Series E86 Z4 3.0Si (N52) COUPE
51 14 110
Removing and installing/replacing rear model
designation
Important!
The "Instructions for number/letter combination cementing"
serve as the basis for these repair instructions and must be
followed without fail.
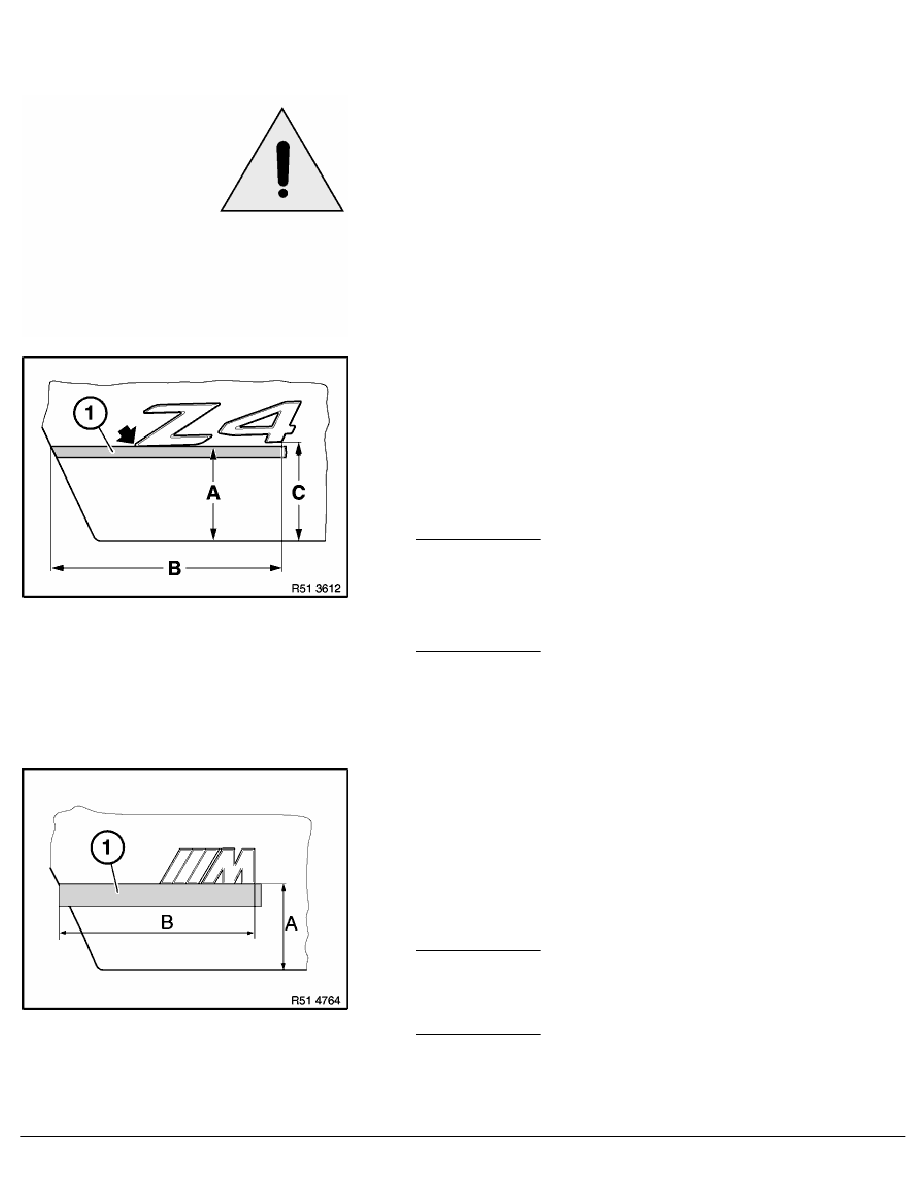
Stick on top edge of adhesive tape (1) parallel to bottom edge of
rear lid at distance (A).
Mark measurement (B) on top edge of adhesive tape (1).
Remove liner (protective strip for adhesive surface).
Position corner of number "4" at measurement (C).
Position letter "Z" with marked tip up against adhesive tape (1)
and press down firmly.
Dimensions E85:
A = 72 mm
B = 195 mm
C= 74 mm
Dimensions E86:
A = 67 mm
B = 192 mm
C= 69 mm
M Roadster / M Coupé:
Stick on top edge of adhesive tape (1) parallel to bottom edge of
rear lid at distance (A).
Mark measurement (B) on top edge of adhesive tape (1).
Remove liner (protective strip for adhesive surface) from emblem.
Position emblem up against adhesive tape (1) and at
measurement (B) and press down firmly.
Dimensions E85:
A = 76.5 mm
B = 172 mm
Dimensions E86:
A = 79 mm
B = 173 mm
RA Removing and installing/replacing rear model designation
BMW AG - TIS
08.02.2013 13:41
Issue status (12/2007) Valid only until next DVD is issued
Copyright
Page - 1 -