
Z Series E86 Z4 3.0Si (N52) COUPE
Important!
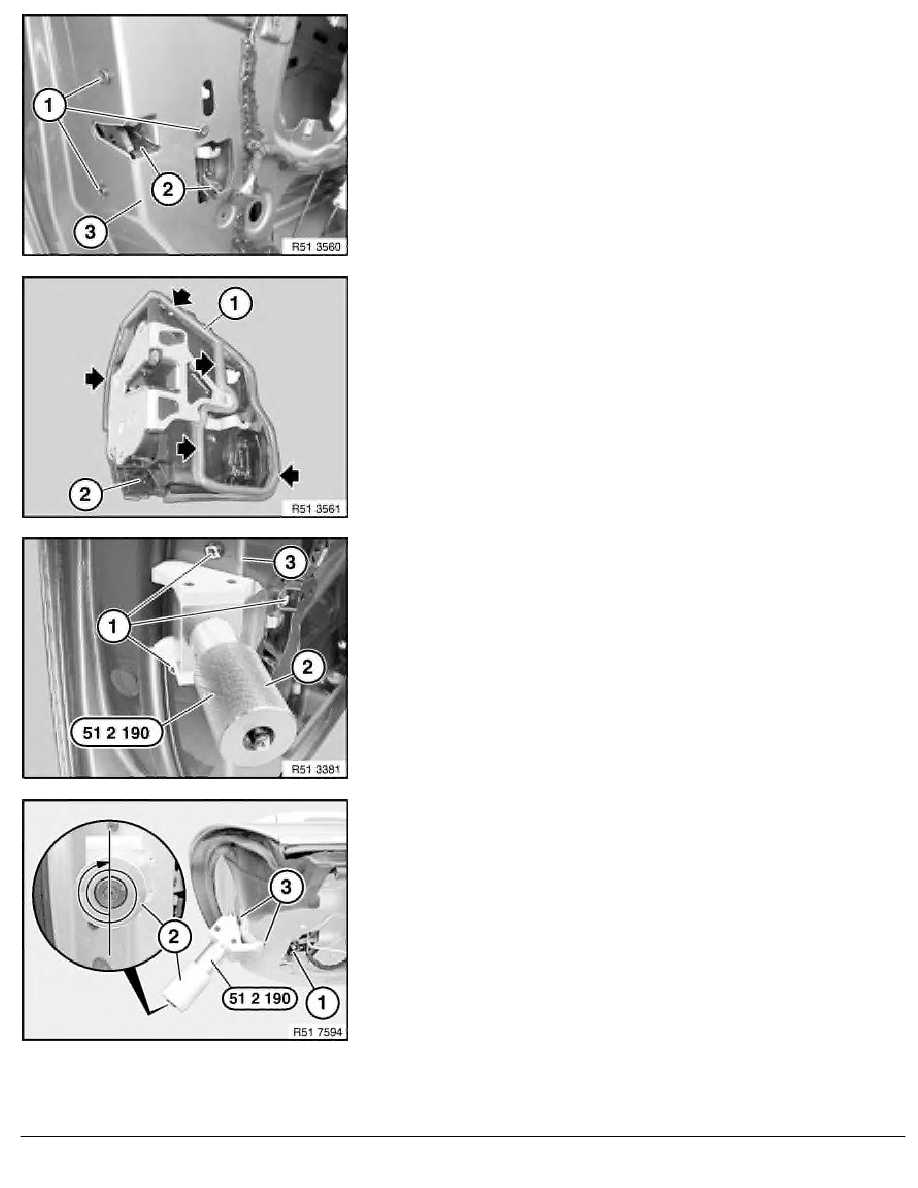
Do not damage door lock seal during removal.
Release screws (1).
Remove door lock (2) from inside.
Important!
To avoid leaking and electrical malfunction:
Pull door lock (2) with special tool into corner (3), see Figs.
R51 3381 and R51 7594.
Installation:
Seal (1) on door lock (2) must not be damaged.
Installation:
-
Install door lock and insert screws (1), do not tighten down.
-
Slide special tool 51 2 190 into opened rotary latch until
latch engages in first stage.
Installation:
-
Pretension door lock (1) with knurled screw (2) until special
tool 51 2 190 just contacts corner points (3).
Important!
To tension door lock (1), it is only permitted to turn knurled
screw (2) by a further 1 to 1.5 turns (max.) (risk of
damage).
Door lock seal must rest uniformly on inner door plate (water
ingress).
-
Tighten down door lock screws, tightening torque
51 21 1AZ
.
RA Removing and installing/replacing door lock in left or right front door
BMW AG - TIS
08.02.2013 14:07
Issue status (12/2007) Valid only until next DVD is issued
Copyright
Page - 2 -