
Century V6-3.1L VIN J (2005)
2. Important: Ensure that the locking tab and the flanges are in the full engaged position.
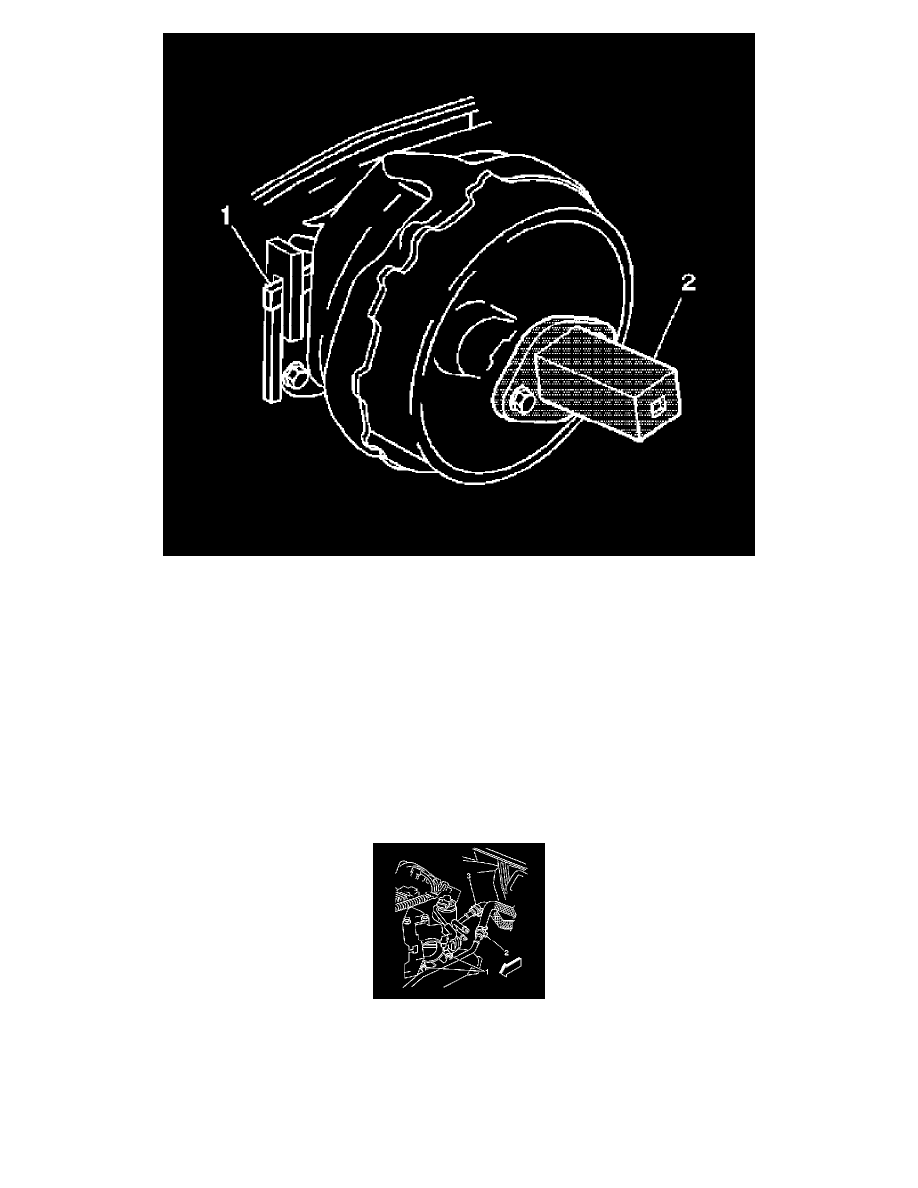
Turn the vacuum brake booster clockwise with a ratchet on the J 22805-B (2). DO NOT use a flat-bladed tool in the locking tab to install the
vacuum brake booster. When the vacuum brake booster is correctly installed, the locking tab (1) slides up the flange and engages the locking
notch.
3. Remove the J 22805-B (2) from the installed vacuum brake booster.
4. Reposition and connect the vacuum hose and check valve assembly to the booster.
5. Notice: Refer to Fastener Notice in Service Precautions.
Reposition the master cylinder onto the booster and install the master cylinder retaining nuts.
Tighten the master cylinder retaining nuts to 25 Nm (18 ft. lbs.).
6. Connect the brake fluid level sensor electrical connector to the brake fluid level sensor.
7. Return the engine to the original rest position. Install the left and right engine mount struts.
8. Install the heater inlet pipe.
9. Reposition and connect the coolant outlet (2) and inlet (3) bypass hoses.
10. Reposition and connect the EVAP canister purge valve pipe, the fuel feed pipe and return pipe.
11. Install the air cleaner inlet duct.
12. Install the cross vehicle brace.
13. Fill the cooling system.
14. Connect the brake booster pushrod to the brake pedal and install the retaining clip.
15. Connect the stoplamp switch electrical connector to the stoplamp switch.