
Riviera V6-3.8L SC VIN 1 (1995)
Compressor Clutch Hub: Service and Repair
Remove or Disconnect
Clutch Plate And Hub Assembly Removal
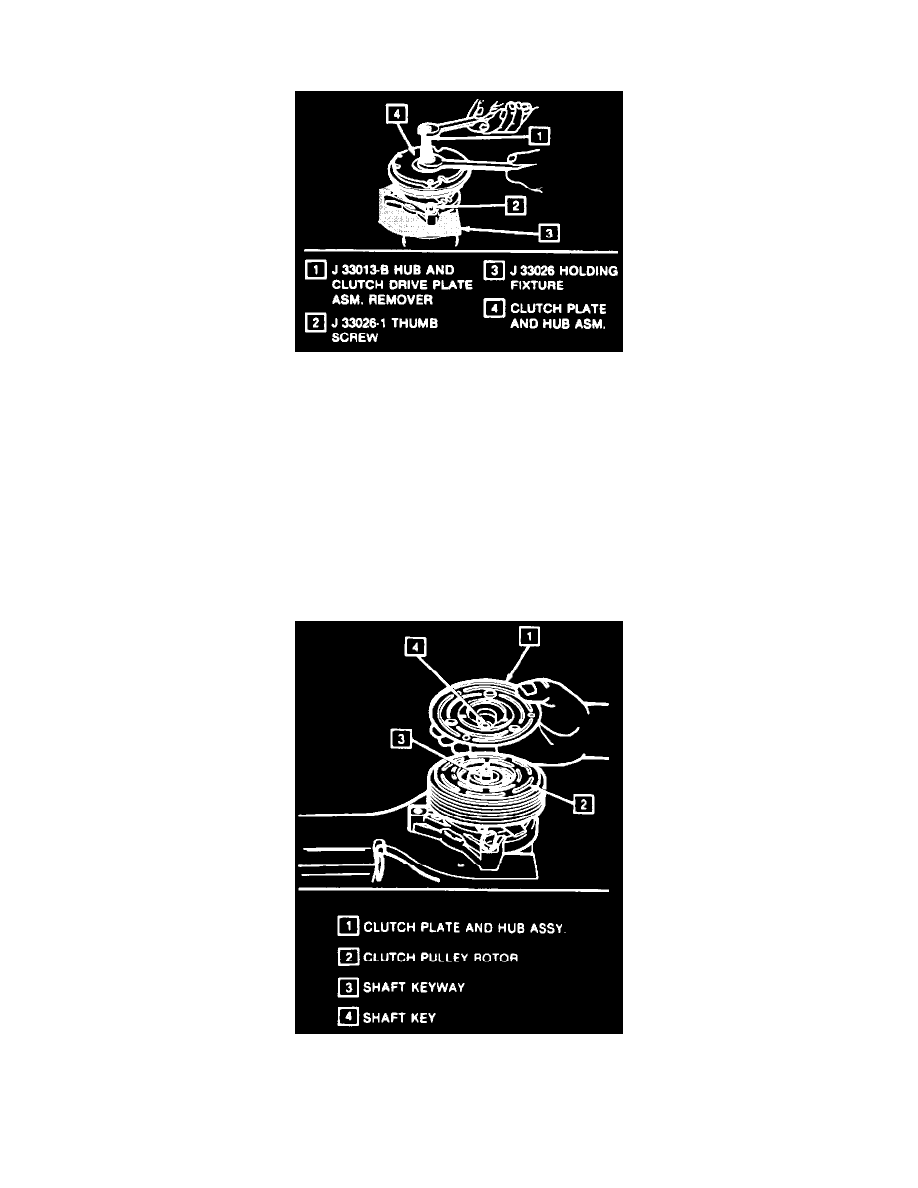
1. Clamp the holding fixture J 33026 in a vise and attach compressor to holding fixture with thumb screws J 33026-1.
2. With center screw forcing tip in place to thrust against the end of the shaft, thread the Clutch Plate and Hub Assembly Installer-Remover J
33013-B into the hub. Hold the body of the remover with a wrench and turn the center screw into the remover body to remove the clutch plate and
hub assembly (Fig. 3).
NOTICE: Do not drive or pound on the clutch hub or shaft. Internal damage to compressor may result. The forcing tip on J 33013-B
remover-installer center screw must be flat or the end of the shaft/axial plate assembly will be damaged.
3. Remove the shaft key and retain for reassembly.
Install or Connect
Shaft Key, Clutch Plate/Hub Installation
1. Install the shaft key into the hub key groove. Allow the key to project approximately 3.2mm (1/8") out of the keyway. The shaft key is curved
slightly to provide an interference fit in the hub key groove.