
Riviera V6-3.8L SC VIN 1 (1995)
Air Dryer: Testing and Inspection
CAUTION; When diagnostic procedures require that vehicle be raised on a hoist, it is important that the rear axle assembly remains in
the normal trim height position at all times. When a frame contact hoist is used, two additional jack stands should be used to support the
rear axle or control arms in the normal trim height position.
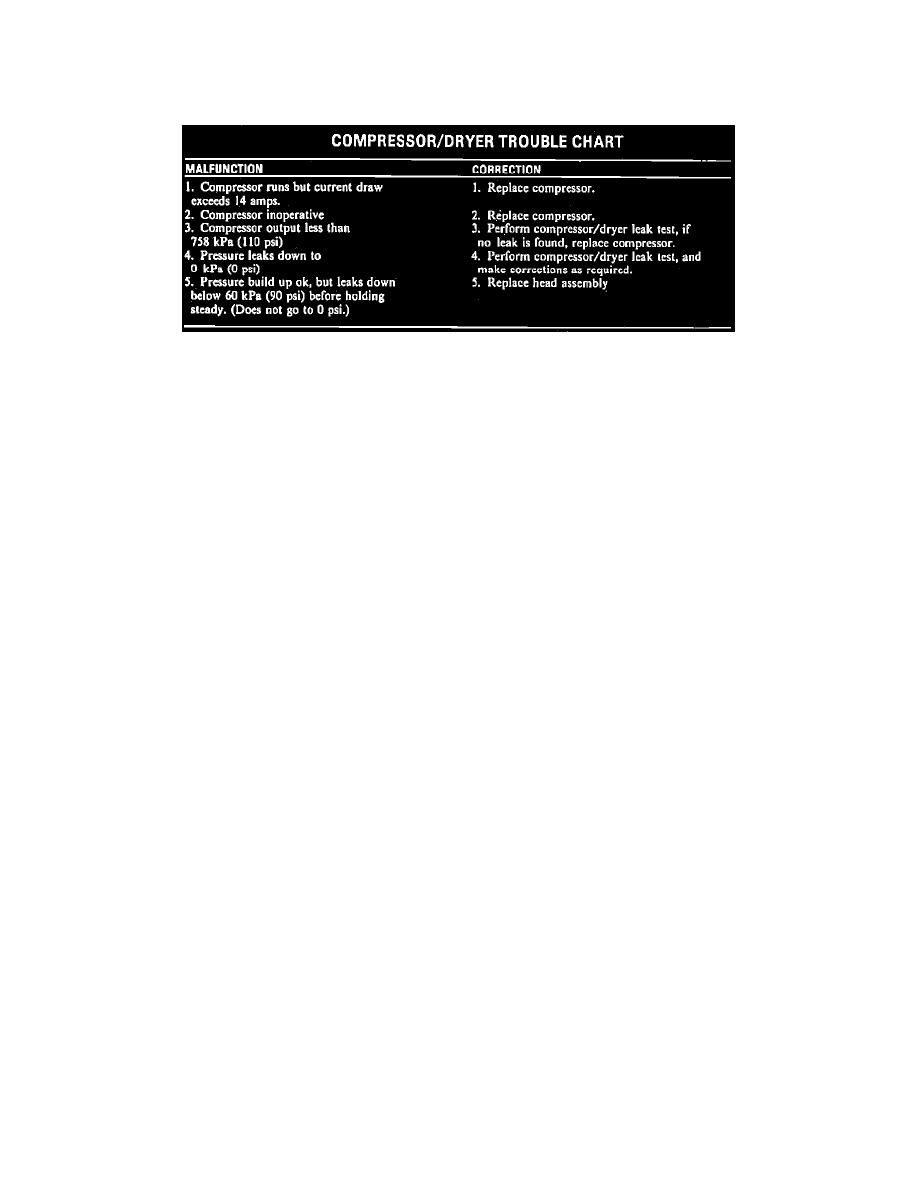
Fig. 21 Compressor/Dryer Trouble Chart
1.
Disconnect wiring from compressor motor and exhaust solenoid terminals.
2.
Disconnect existing pressure line from dryer and attach pressure gauge tool No. J 22124-A or equivalent to dryer fitting.
3.
Connect an ammeter to 12 volt source and to compressor.
4.
Operate compressor and note the following:
a. Current draw should not exceed 14 amps.
b. When gauge reads at least 100 psi, turn compressor Off by disconnecting power supply and observe if pressure leaks down. Compressor
should not leak below 90 psi. If compressor is permitted to run until it reaches maximum output pressure of 180 psi, the solenoid exhaust
valve will act as a relief valve. The resulting leak down when compressor is shutoff will indicate a false leak.
c. Refer to chart shown in Fig. 21 if compressor fails to meet specification.
d. If performance is satisfactory, install compressor and connect wiring and air lines.