Skylark V6-3100 3.1L VIN M SFI (1996)

4.
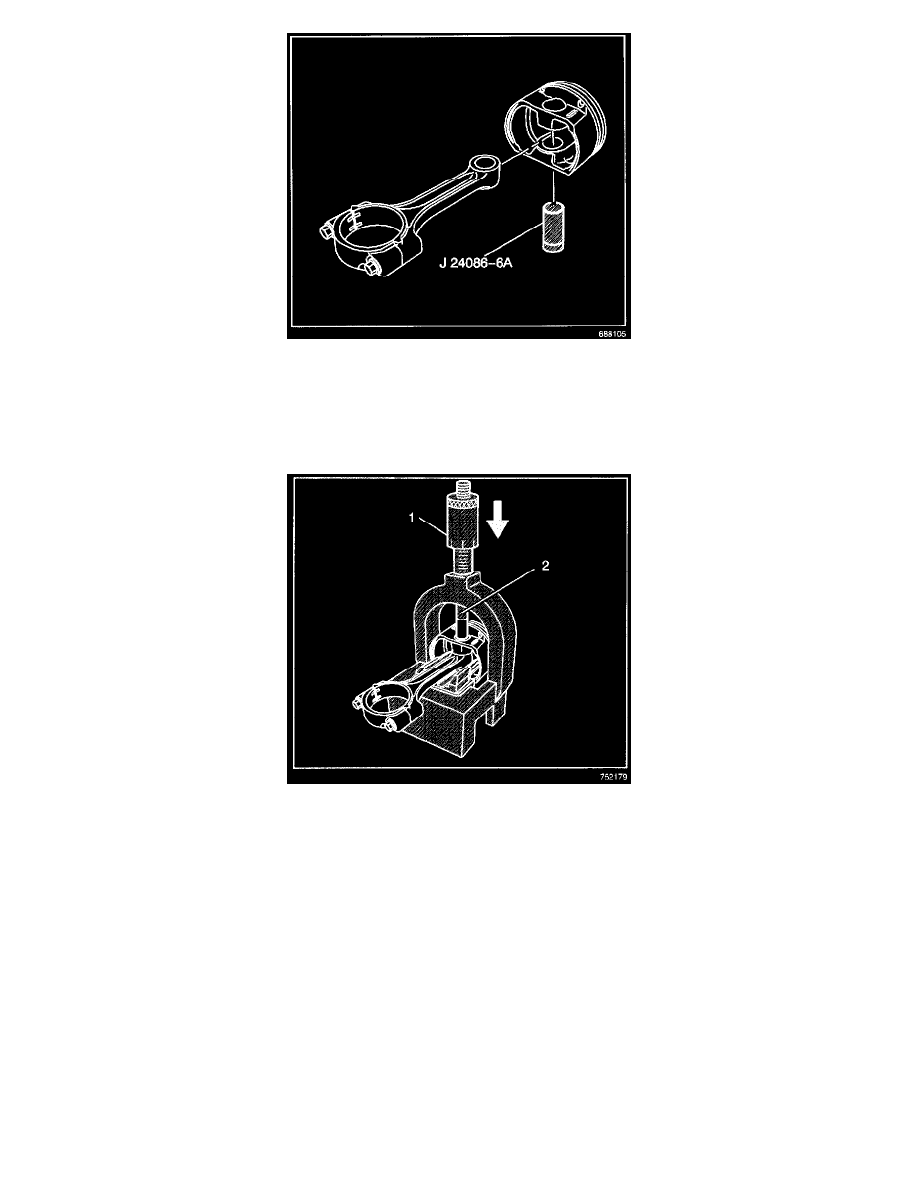
Refer to the above illustration. Assemble the piston, the connecting rod, and the J 24086-6A adapter as shown. Insert the piston and connecting rod
assembly into the J 24086-10 fixture support assembly.
Notice:
After the J 24086-9 installation pin bottoms on the J 24086-10 fixture support assembly, do not exceed a pressure of 35,000 kPa (5,000 psi), or
damage to the connecting rod press may result.
5.
Refer to the above illustration. Install the J 24086-105 (2) onto the piston pin. Position the J 24086-9 (1) though the J 24086-10 fixture support
assembly and onto the J 24086-105 (2).
6.
Press the J 24086-9 (1) installation pin until it bottoms on the J 24086-10 fixture support assembly.
7.
Reinstall the piston rings onto the new piston. Refer to the Engine Repair Section of the Service Manual for proper ring gap positioning.
