
Allante V8-273 4.5L (1991)
Hydraulic Assembly: Service and Repair
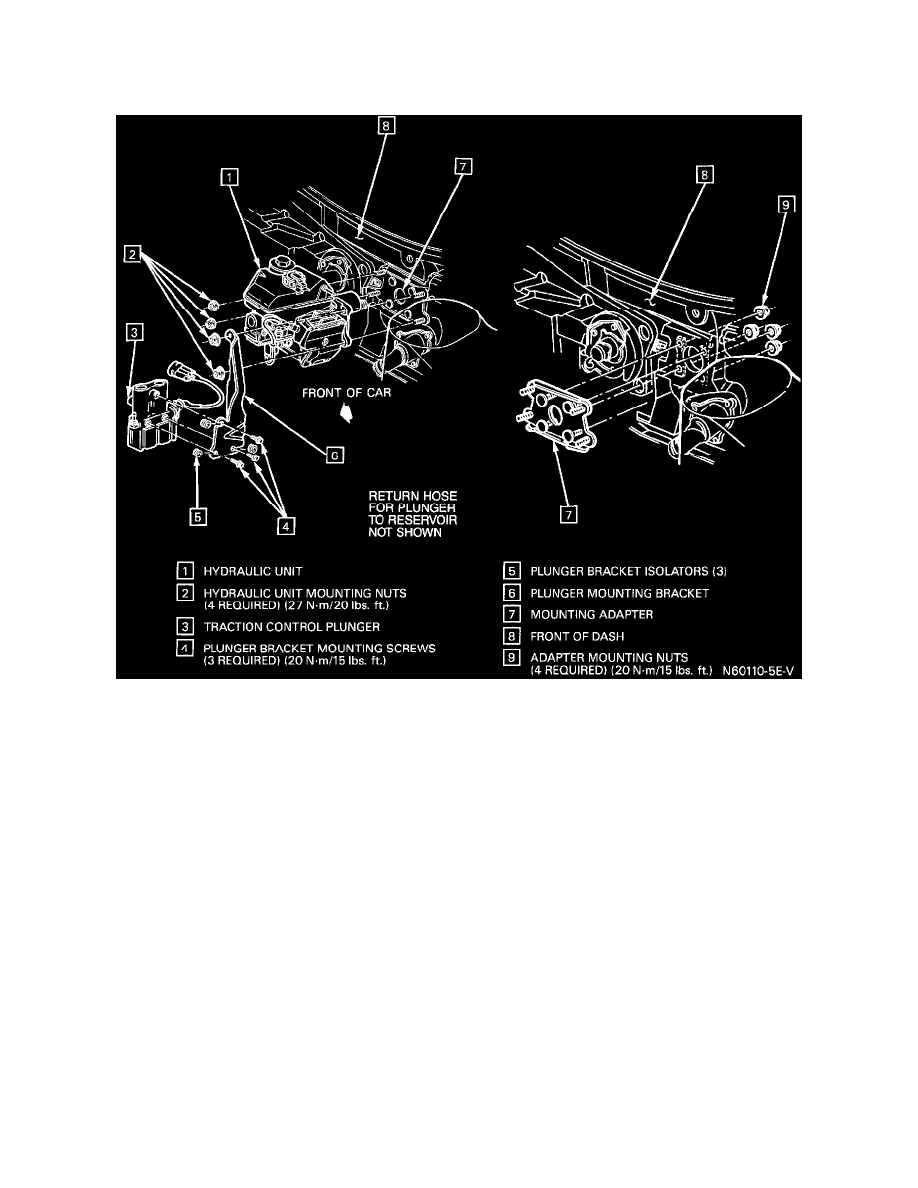
Hydraulic Unit
HYDRAULIC UNIT
Hydraulic Unit And Plunger Mounting
REMOVE OR DISCONNECT
1. Depressurize hydraulic accumulator by pumping the brake pedal a minimum of 25 times.
CAUTION: Failure to depressurize hydraulic accumulator prior to performing this operation may result In personal injury and/or
damage to painted surfaces.
2. Remove air intake duct clamps at air cleaner and throttle body. Remove duct from car.
3. Remove nuts retaining cross-car underhood brace. Reposition brace for access to hydraulic unit.
4. Disconnect all electrical connections from the hydraulic unit and pump motor assembly.
5. Remove as much fluid as possible from the hydraulic unit reservoir.
6. Remove pressure hose fitting (banjo bolt) from hydraulic unit. Take care not to drop either of the two washers used to seal the pressure hose fitting
to the hydraulic unit inlet.
7. Disconnect return hose from reservoir nipple.
8. Remove the traction control plunger assembly.
9. Disconnect all brake pipes from hydraulic unit.
10. From inside car, remove the driver's side sound insulator panel.
11. Remove pushrod retainer and foam washer from pedal hub (pin).
12. From underhood, remove the four mounting nuts holding hydraulic unit to the mounting adapter.
13. Position hydraulic unit to disengage push rod from pedal hub (pin) and remove hydraulic unit from car.
INSTALL OR CONNECT
IMPORTANT
^
New hydraulic units are shipped without the pushrod installed.