
Catera V6-3.0L VIN R (1997)
Brake Rotor/Disc: Service and Repair
Brake Rotor Replacement
REMOVAL PROCEDURE
1. Remove one-third of the brake fluid from the brake master cylinder reservoir.
2. Release the parking brake if applied.
3. Raise and suitably support the vehicle.
4. Remove the tire and wheel assembly. Refer to Tires and Wheels.
5. Use a screwdriver to gently pry between the rotor and each brake pad to bottom the pistons in their bores.
Important: Use only minimal effort to manipulate the pistons. Ensure to use slow gradual force as the cylinders are so small.
6. Remove the brake pipe retainer from the brake pipe mounting bracket on the control arm about 2 feet up the brake pipe from the caliper.
7. Remove the brake pipe from the slot in the bracket.
Important: Use only enough force as necessary to remove the brake pipe from the bracket. Ensure not to distort the pipe.
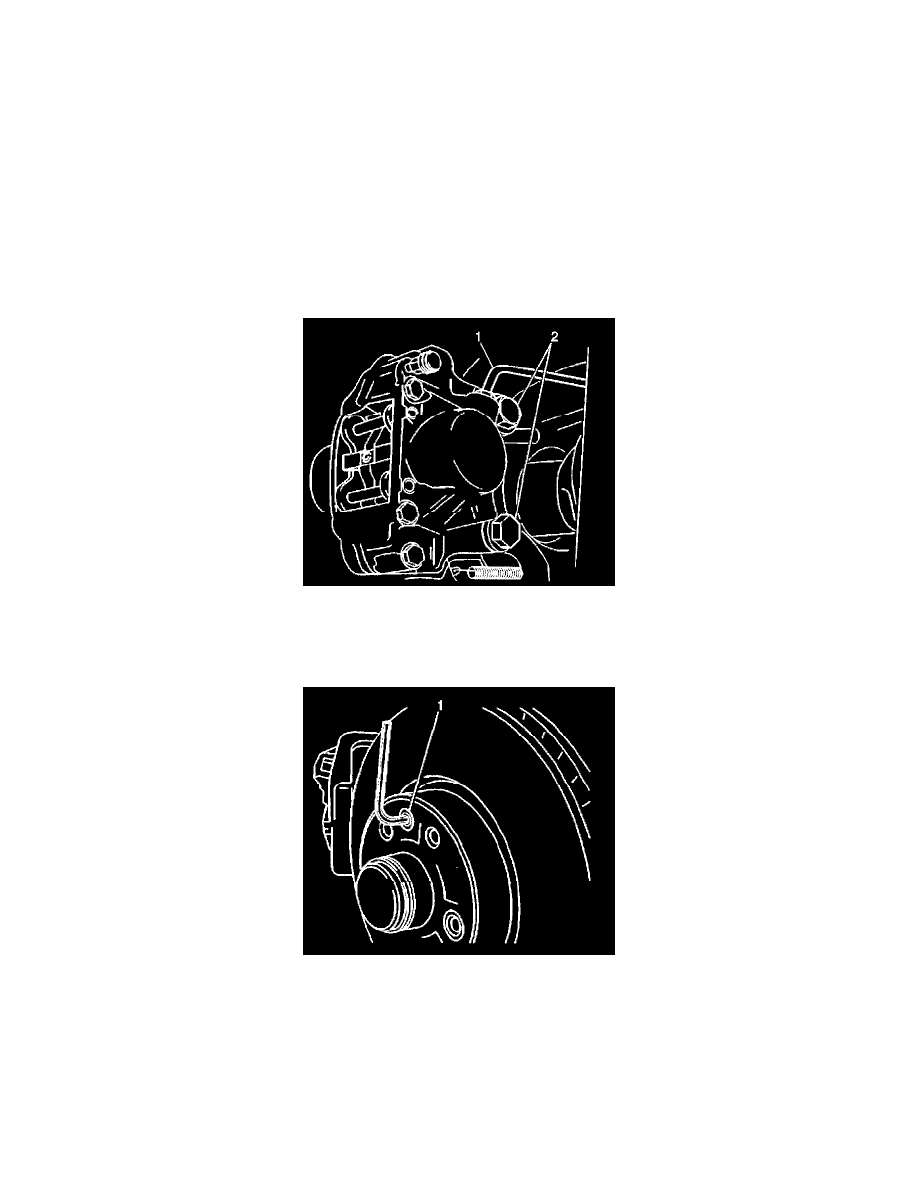
8. Remove the caliper bolts (1).
9. Remove the caliper from the rotor.
Important: Hang the caliper from the spring so the weight of the caliper does not bend the brake pipe.
10. Remove the rotor set screw (1).
11. Remove the rotor.
INSTALLATION PROCEDURE
1. Install the rotor.
Notice:Whenever the rotor has been separated from the axle flange, clean any rust or foreign material from the mating surface of the axle flange
and brake rotor. Failure to do this may result in increased lateral runout of the rotor and brake pulsation.