
Catera V6-3.0L VIN R (1997)
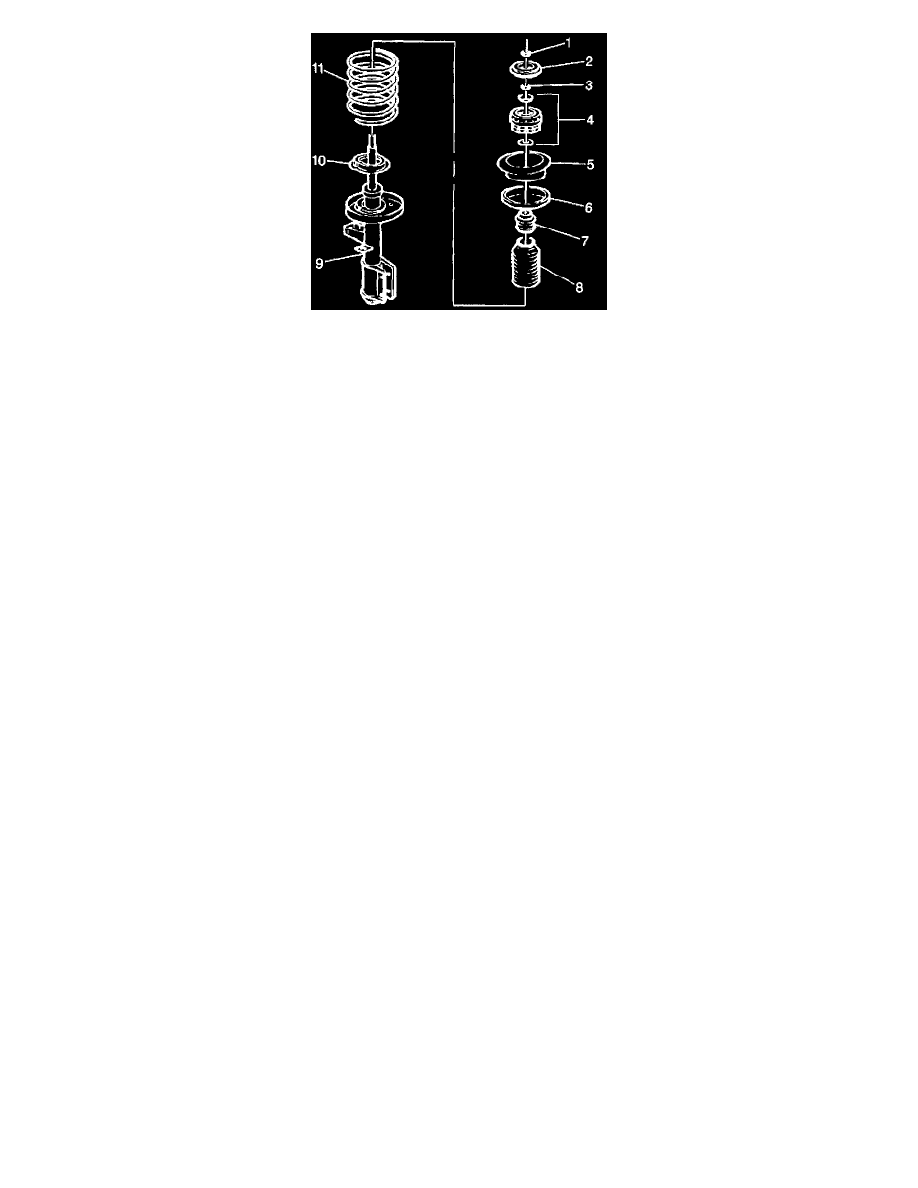
4. Remove the upper bearing support nut (3). Counter-hold the strut piston if necessary.
5. Remove the bearing and plate assembly (4).
6. Decompress the spring.
7. Disassemble the following components: Remove the upper spring support plate (5). Remove the upper insulator (6). Remove the strut bumper (7).
Remove the strut cover from the strut (8).
8. Remove the spring (11) from the strut (9).
9. Remove the lower insulator from the strut (10).
ASSEMBLY PROCEDURE
NOTICE: Care should be taken to avoid chipping or scratching the coating when handling the suspension coil spring. Damage to the coating can cause
premature failure.
1. Install lower insulator to the strut (10).
2. Install the spring (11) to the strut (9).
3. Assemble the following components:
^
Install the upper spring support plate (5).
^
Install the upper insulator (6).
^
Install the strut bumper (7).
^
Install the strut cover to the strut (8).
4. Position the spring within the upper and within the lower rubber isolation rings.
5. Compress the spring (11).
6. Install the bearing and plate assembly (4).
7. Install the upper bearing support nut (3).
^
Tighten the upper bearing support nut to 70 Nm (52 lb ft.)
NOTICE: Use the correct fastener in the correct location. Replacement fasteners must be the correct part number for that application.
Fasteners requiring replacement or fasteners requiring the use of thread locking compound or sealant are identified in the service procedure.
Do not use paints, lubricants, or corrosion inhibitors on fasteners or fastener joint surfaces unless specified. These coatings affect fastener
torque and joint clamping force and may damage the fastener. Use the correct tightening sequence and specifications when installing fasteners
in order to avoid damage to parts and systems.
^
Release the spring tension from the spring compressor.
8. Remove the strut assembly from the J 34013-B. Check that the spring is properly positioned between the insulators.
9. Install strut to vehicle.