
CTS Sedan AWD V6-3.0L (2010)
Note: In the following service procedures, ensure that cones on either end of the propeller shaft are properly seated in the drive flanges.
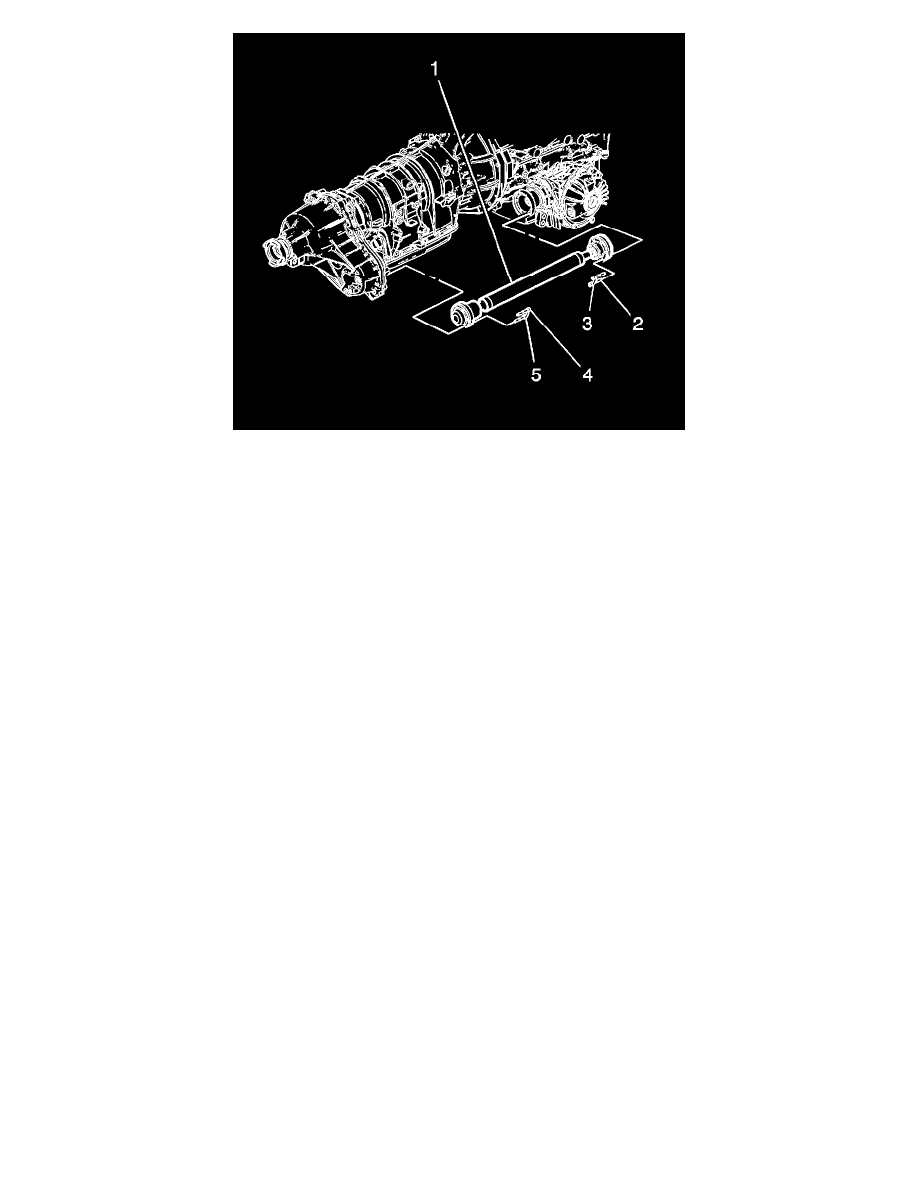
Note: Align the reference marks on the propeller shaft to the drives on the transfer case and the front drive axle.
1. Install the propeller shaft (1) in the front drive axle flange.
2. Install the propeller (1) shaft in the transfer case drive flange.
Caution: Refer to Fastener Caution (See: Service Precautions/Vehicle Damage Warnings/Fastener Caution).
Note: In steps 3 and 4, secure the bolt at the 12 o'clock first then the bolt at the 6 o'clock position before securing the remaining bolts and locks.
3. Install the mounting bolts (2) and the locks (3) to the front drive axle flange and tighten to 30 Nm (22 lb ft).
4. Install the mounting bolts (4) and the locks (5) to the rear drive axle flange and tighten to 30 Nm (22 lb ft).
5. Install the front drive axle heat shield. Refer to Shield Replacement (See: Differential Assembly/Service and Repair).
6. Install the right catalytic convertor. Refer to Catalytic Converter Replacement - Right Side (LLT) (See: Engine, Cooling and Exhaust/Exhaust
System/Catalytic Converter/Service and Repair/Catalytic Converter Replacement - Right Side)Catalytic Converter Replacement - Right Side
(LSA) (See: Engine, Cooling and Exhaust/Exhaust System/Catalytic Converter/Service and Repair/Catalytic Converter Replacement - Right Side
)Catalytic Converter Replacement - Right Side (LF1) (See: Engine, Cooling and Exhaust/Exhaust System/Catalytic Converter/Service and
Repair/Catalytic Converter Replacement - Right Side).
7. Install the lower engine shield.
8. Remove the support and lower the vehicle.