
DeVille V8-4.6L VIN Y (1998)
Idle Air Control (IAC) Valve: Service and Repair
Description
Description
REMOVAL PROCEDURE
IMPORTANT: The hardware used to attach the Throttle Position (TP) sensor and Idle Air Control (IAC) valve is coated with thread-locking adhesive.
If these parts are removed for service, inspect the attaching screw threads. There should be enough thread-locking material (adhesive or compound) on
the threads to insure proper re-locking. If not, clean the threads and apply Loctite (R) 262, GM Part No. 1052624, or equivalent, to the threads before
re-assembly.
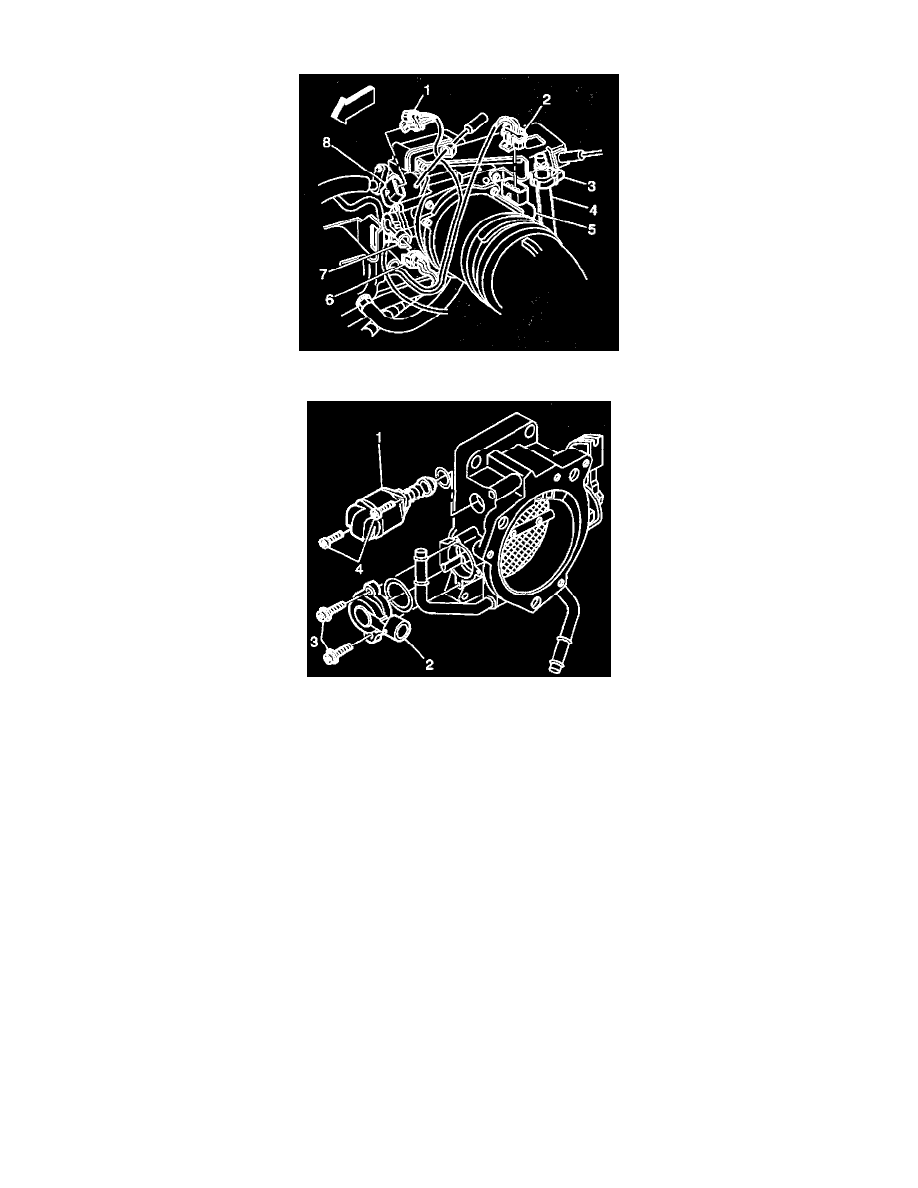
1. Remove the IAC electrical connector (1) from the IAC valve (8).
2. Remove the two IAC valve attaching screws (4) from the IAC valve (1).
3. Remove the IAC valve (1) from the throttle body.
4. Remove the IAC valve O-ring from the IAC valve.
INSTALLATION PROCEDURE
NOTICE: The IAC valve may be damaged if installed with the cone (pintle) extended more than 28 mm (1-1/8 in).
Measure the distance that the valve is extended before installing a new valve. The distance from the idle air control valve motor housing to the end of the
idle air control valve pintle should be less than 28 mm (1-1/8 in). Manually compressing the pintle until the extension is less than 28 mm (1-1/8 in).
1. Install the new IAC O-ring.
2. Install the IAC valve (1) to the throttle body and tighten the screws (4).